Hyundai Elantra CN7: Sunroof
Components and components location
| Components |
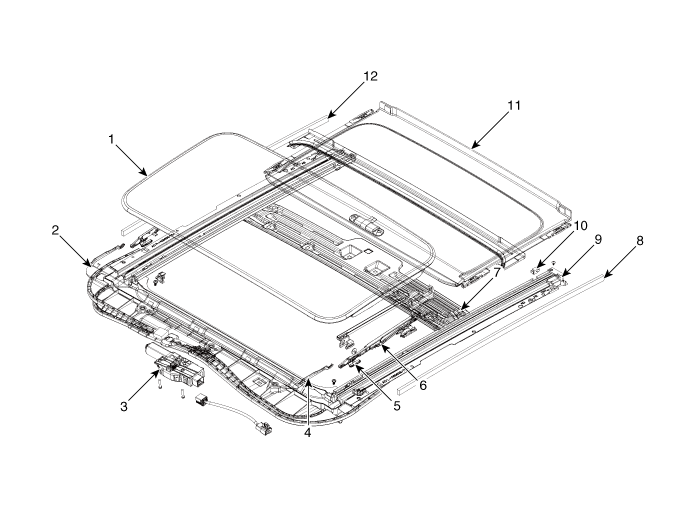
| 1. Glass panel assembly 2. Deflector 3. Motor assembly 4. Spring base assembly 5. Seth plate assembly 6. Guide assembly | 7. Frame sub assembly 8. Seal tape 9. Rear drip 10. Stopper 11. Sunshade assembly 12. Drip rail assembly |
Repair procedures
| Adjustment |
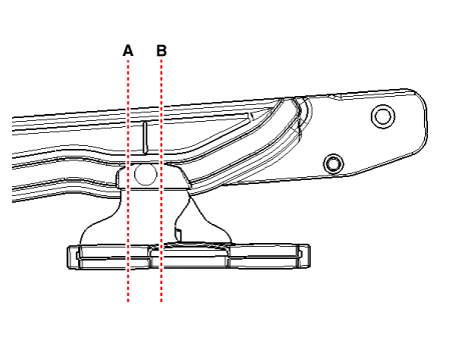
| Inspect Glass Alignment |
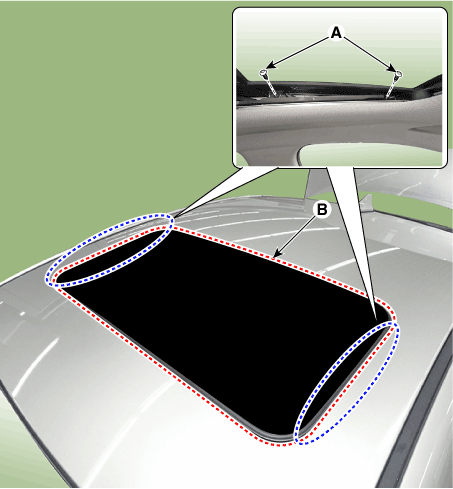
| 1. | Inspect the step height between the roof panel (A) and the glass weatherstrip (B) and then adjust it if necessary.
|
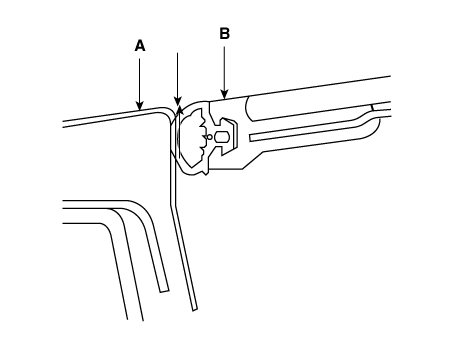
| 2. | Adjust the height of the glass by slighly loosening the screws (A).
|
| When To Initialize The Motor |
| 1. | After initial vehicle assembly. |
| 2. | If the initial value is erased or damaged because of short power electric discharge during operation. |
| 3. | After using the manual handle. |
| Operating The Sunroof Emergency Handle |
| 1. | Use the sunroof emergency handle to close or open the sunroof manually if the sunroof cannot be closed electronically due to motor or controller electrical malfunction.
|
| 2. | If needed, initialize the sunroof according to the initialization method. Whenever the vehicle battery is disconnected or discharged, or you use the emergency handle to operate the sunroof, you have to reset your sunroof system as follows :
|
Sunroof Glass
Components and components location
| Components Location |
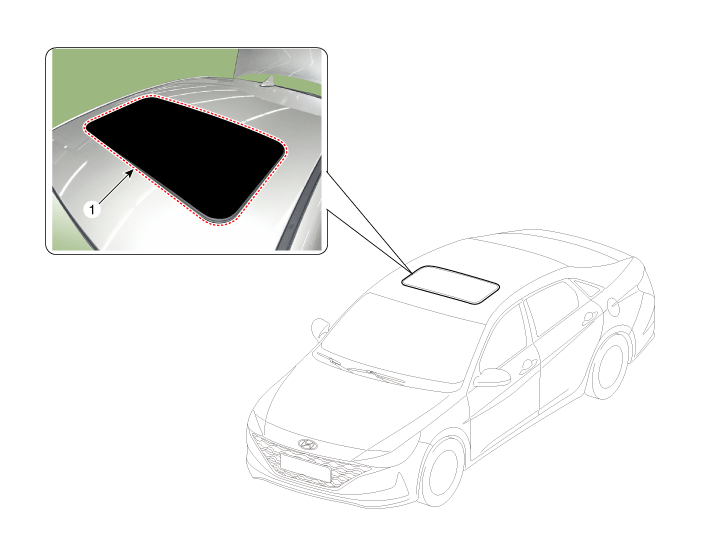
| 1. Sunroof glass |
Repair procedures
| Replacement |
|

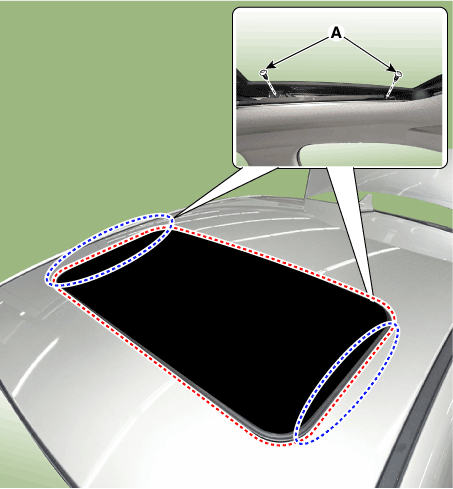
| 1. | Close the sunroof glass completely by pressing the sunroof switch. |
| 2. | Loosen the mounting screws (A) and remove the sunroof glass (B).
|

| 3. | To install, reverse the removal procedure.
|

Sunroof Deflector
Repair procedures
| Replacement |
| 1. | Open the glass fully. |
| 2. | Remove the mounting pins (C), from the frame (B), and then remove the deflector (A).
|

| 3. | To install, reverse the removal procedure. |
Sunroof Assembly
Components and components location
| Components Location |
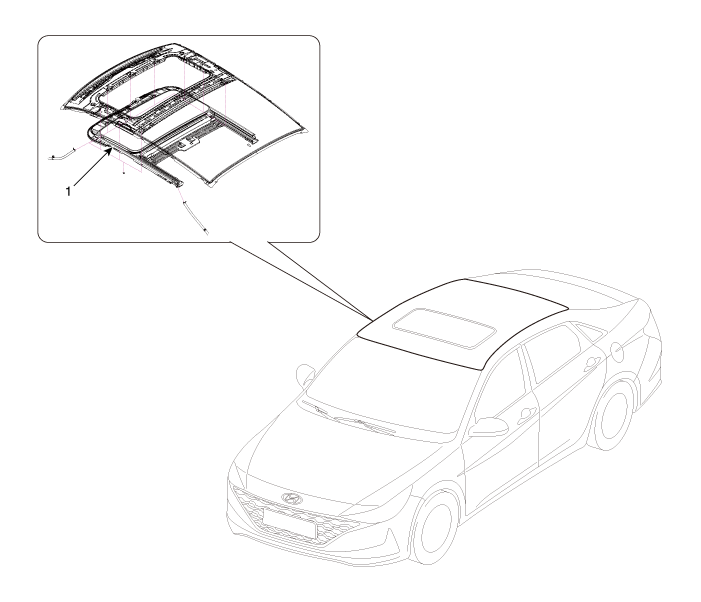
| 1. Sunroof assembly |
Repair procedures
| Replacement |
|
| 1. | Remove the roof trim. (Refer to Roof Trim - "Roof Trim Assembly") |
| 2. | Remove the sunroof glass. (Refer to Sunroof - "Sunroof Glass") |
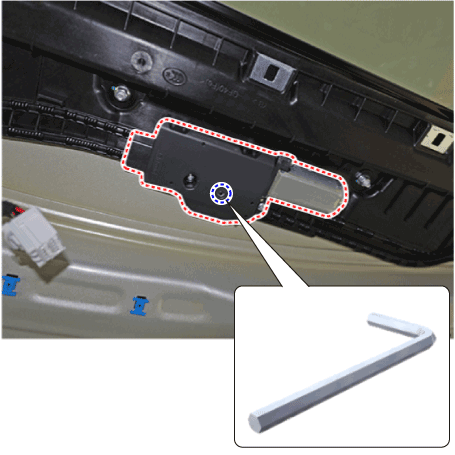
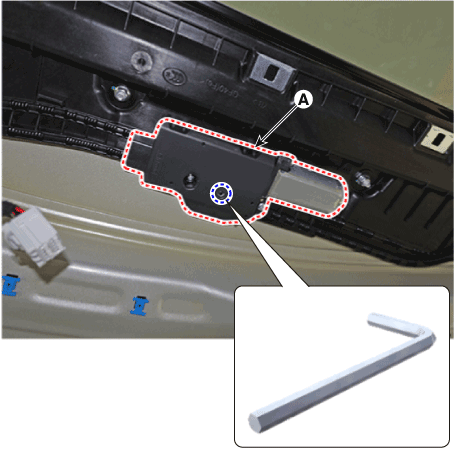
| 3. | Loosen the mounting screws and remove the sunroof motor (A).
|
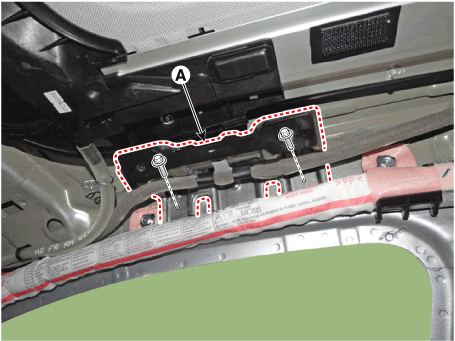
| 4. | After loosening the mounting bolts, then remove the assist handle bracket (A).
|
| 5. | Disconnect the drain tubes (B). |
| 6. | After loosening the mounding nuts and bolts, remove the sunroof assembly (A).
|
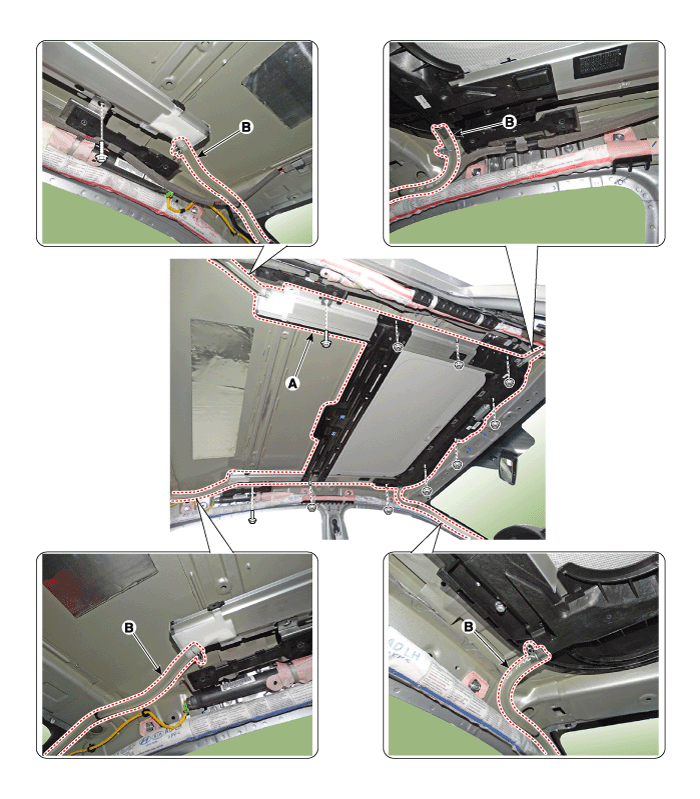
| 7. | To install, reverse the removal procedure.
|
Sunroof Sunshade
Repair procedures
| Replacement |
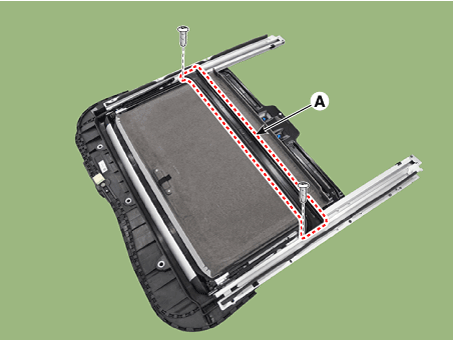
| 1. | Remove the sunroof assembly. (Refer to Sunroof - "Sunroof Assembly") |
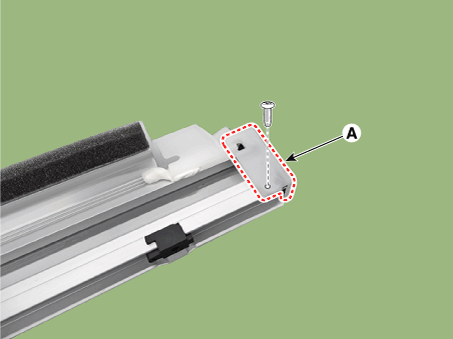
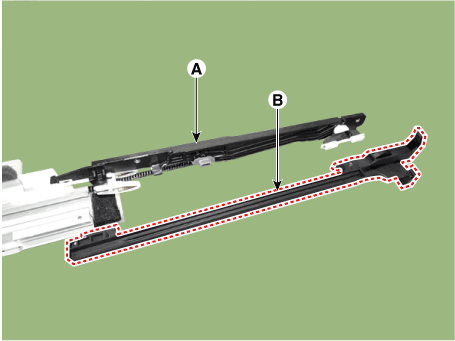
| 2. | After loosening the mounting screws, remove the drip rail assembly (A).
|
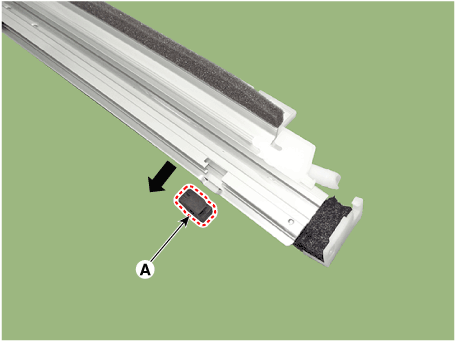
| 3. | After loosening the mounting screws, disengage the rear drip (A).
|
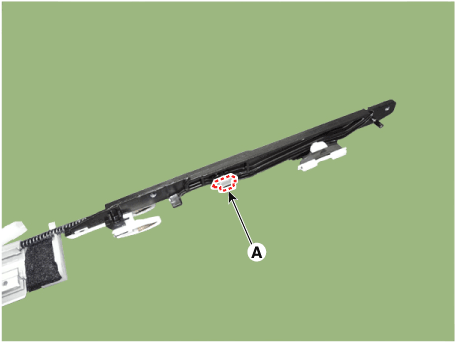
| 4. | Remove the stopper (A) by pushing it in the direction of the arrow.
|
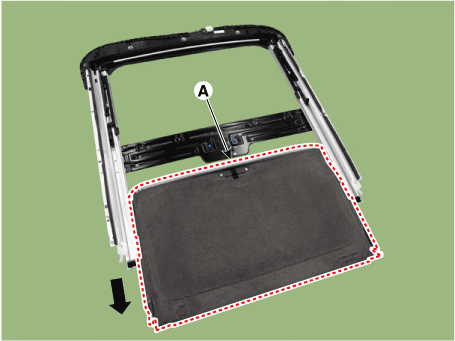
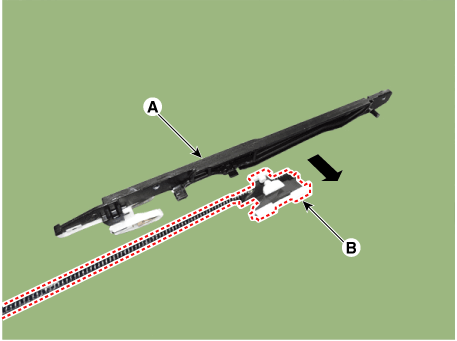
| 5. | Remove the sunroof sunshade (A) by pushing it backward.
|
| 6. | To install, reverse the removal procedure. |
Sunroof Guide
Repair procedures
| Replacement |
| 1. | Remove the sunroof assembly. (Refer to Sunroof - "Sunroof Assembly") |
| 2. | Remove the sunroof sunshade. (Refer to Sunroof - "Sunroof Sunshade") |
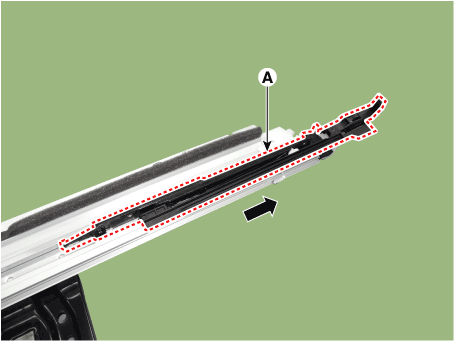
| 3. | Down the slide by pushing it and then remove the drip link assembly (A).
|
| 4. | Separate the drip link (B) and guide (A).
|
| 5. | Remove the shoe (A).
|
| 6. | Separate the guide assembly (A) and the cable (B) by pushing them in the direction of the arrow.
|
| 7. | To install, reverse the removal procedure.
|