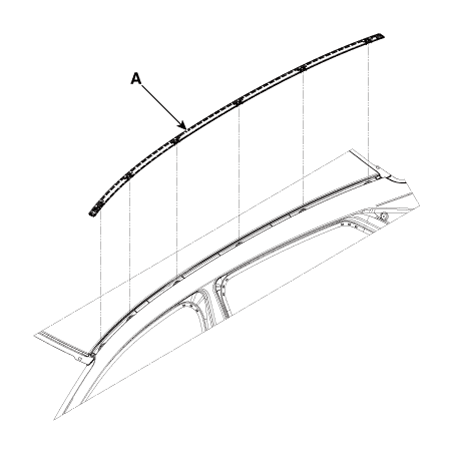
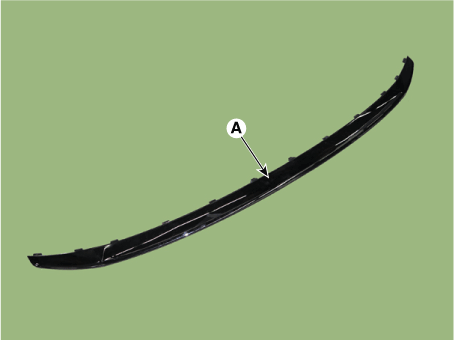
Roof Side Molding
Repair procedures
| •
| When removing with a flat - tip screwdriver or remover, wrap protective tape around the tools to prevent damage to components. |
| •
| Put on gloves to prevent hand injuries. |
|
| 1. | Using a screwdriver or remover, remove the roof side molding (A). | •
| Always replace the roof side molding to a new one. |
|
|
| 2. | To install, reverse the removal procedure. | •
| Replace any damaged clips (or pin - type retainers). |
|
|
Front Wheel Guard
Repair procedures
| •
| When removing with a flat - tip screwdriver or remover, wrap protective tape around the tools to prevent damage to components. |
| •
| Put on gloves to prevent hand injuries. |
|
| 2. | After loosening the mounting clips and remove the front wheel guard (A). 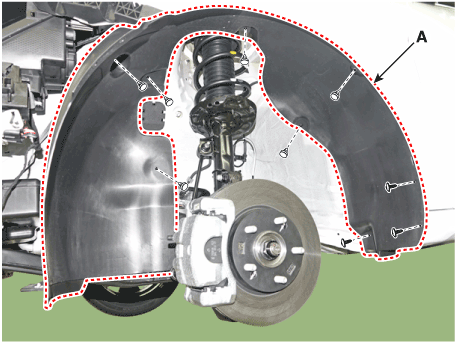
|
| 3. | To install, reverse the removal procedure. | •
| Replace any damaged clips (or pin - type retainers). |
|
|
Rear Wheel Guard
Repair procedures
| •
| When removing with a flat - tip screwdriver or remover, wrap protective tape around the tools to prevent damage to components. |
| •
| Put on gloves to prevent hand injuries. |
|
| 2. | After loosening the mounting screws, clips and nut, remove the rear wheel guard [Rear] (A). 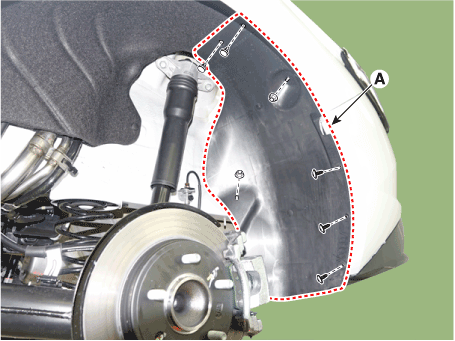
|
| 3. | After loosening the mounting screws, clips and nut, remove the rear wheel guard [Front] (A). 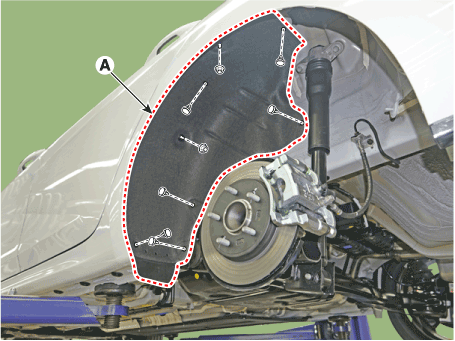
|
| 4. | To install, reverse the removal procedure. | •
| Replace any damaged clips (or pin - type retainers). |
|
|
Front Mud Guard
Repair procedures
| •
| When removing with a flat - tip screwdriver or remover, wrap protective tape around the tools to prevent damage to components. |
| •
| Put on gloves to prevent hand injuries. |
|
| 1. | After loosening the mounting screws and remove the front mud guard (A). 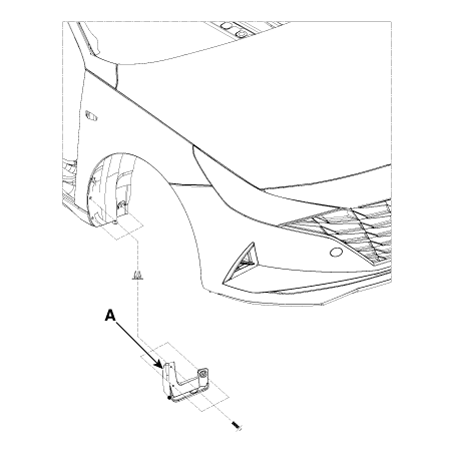
|
| 2. | To install, reverse the removal procedure. | •
| Replace any damaged clips (or pin - type retainers). |
|
|
Rear Mud Guard
Repair procedures
| •
| When removing with a flat - tip screwdriver or remover, wrap protective tape around the tools to prevent damage to components. |
| •
| Put on gloves to prevent hand injuries. |
|
| 1. | After loosening the mounting screws and remove the rear mud guard (A). 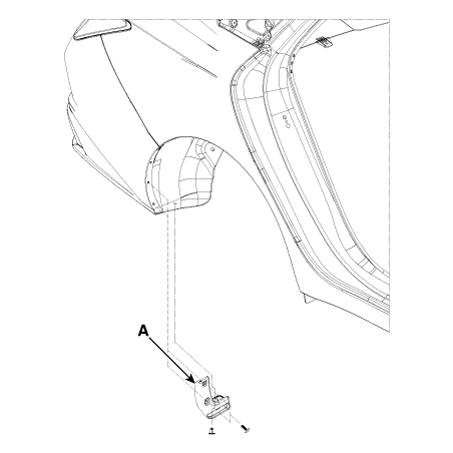
|
| 2. | To install, reverse the removal procedure. | •
| Replace any damaged clips (or pin - type retainers). |
|
|
Rear Spoiler
Components and components location
Repair procedures
| •
| When removing with a flat - tip screwdriver or remover, wrap protective tape around the tools to prevent damage to components. |
| •
| Put on gloves to prevent hand injuries. |
|
| 1. | Remove the trunk lid back panel. (Refer to Trunk Lid - "Trunk Lid Back Panel") |
| 2. | Loosen the mounting screws, remove the trunk lid back panel bracket (A). 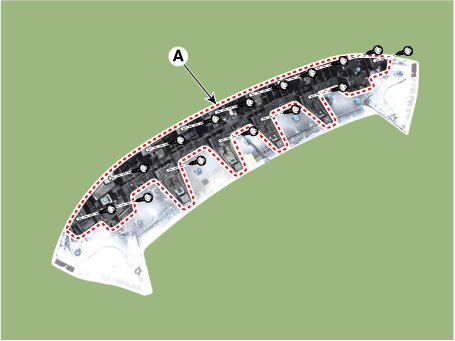
|
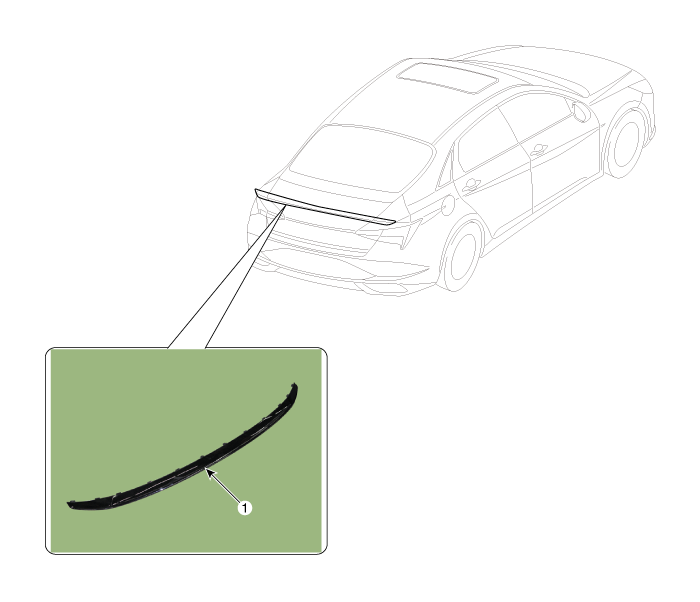
| 3. | Loosen the mounting screws, remove the rear spoiler (A). 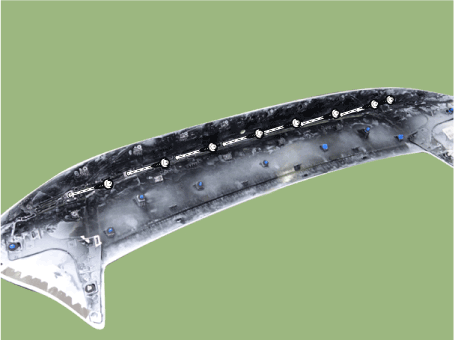
|
| 4. | To install, reverse the removal procedure. |
Components and components location
Components 1. Rear door trim 2. Rear door delta inner cover 3. Rear door belt inside weatherstrip 4. Rear door module 5. Rear door belt outside weatherstrip 6. Re ...
Components and components location
Components1. Glass panel assembly2. Deflector3. Motor assembly4. Spring base assembly5. Seth plate assembly6. Guide assembly7. Frame sub assembly8. Seal tape9. Re ...
 Hyundai Elantra CN7: Body Side Molding


