 Hyundai Elantra CN7: Rear Door
Components and components location
| Components |
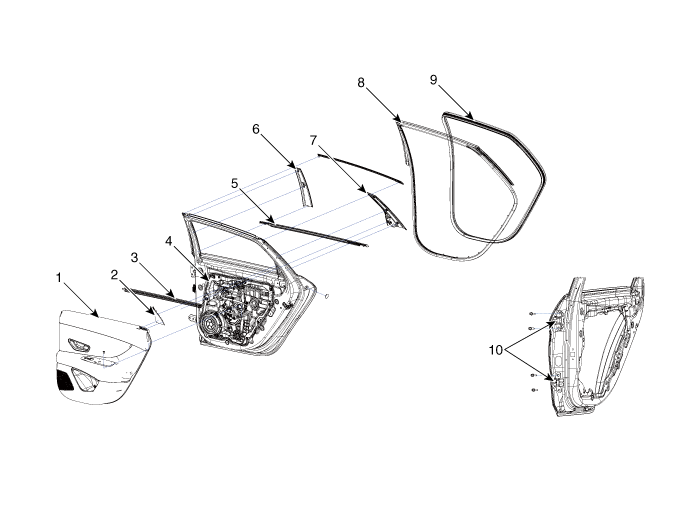
| 1. Rear door trim 2. Rear door delta inner cover 3. Rear door belt inside weatherstrip 4. Rear door module 5. Rear door belt outside weatherstrip | 6. Rear door frame garnish [RH] 7. Rear door frame garnish [LH] 8. Rear door body side weatherstrip 9. Rear door side weatherstrip 10. Rear door hinge |
Repair procedures
| Adjustment |
Glass Adjustment
|

| 1. | Remove the rear door trim. (Refer to Rear Door - "Rear Door Trim") |
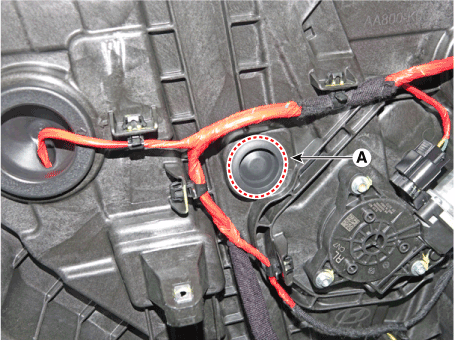
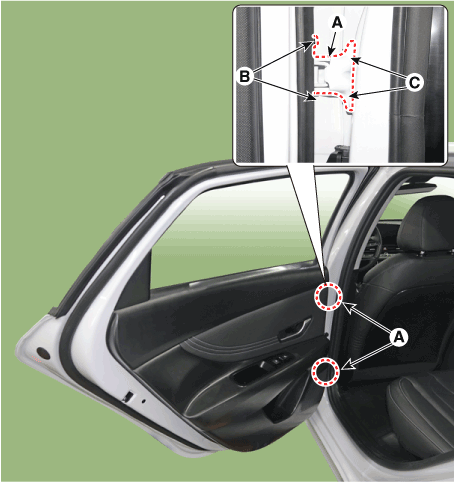
| 2. | Separate the mounting plug hole (A) from the rear door module.
|
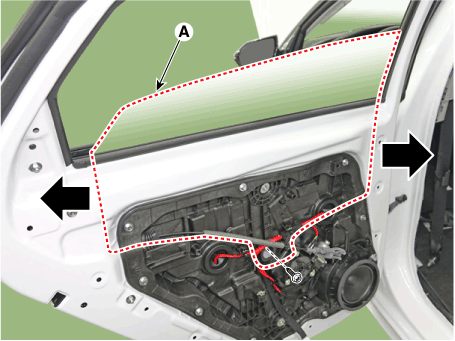
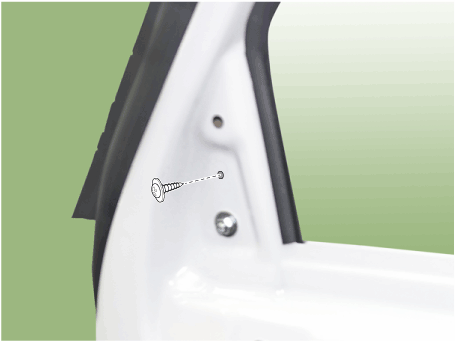
| 3. | After loosening the glass mounting bolts, adjust the spacing of the glass (A) by moving the glass from side to side and then tighten the bolts.
|
| 4. | Check the glass for normal operation. |
Door Striker Adjustment
| 1. | After loosening the mounting screw, adjust the striker (A) by moving it forward and backward or from side to side and then tighten the bolts (B).
|

| 2. | Tap on the striker with a plastic hammer to adjust the striker. The striker will not move much, but will give some adjustment. |
| 3. | Hold the outer handle out, and push the door against the body to make sure that the striker fits flush with the body. If the door latches properly, tighten the screws and recheck. |
Door Position Adjustment
| 1. | Check that the door and body edges are parallel.
|
| 2. | Place the vehicle on a level surface before adjusting the doors. |
| 3. | Adjust the hinges (A) : - Loosen the door mounting bolts slightly, and move the door in or out until it flush with the body. - Loosen the hinge mounting bolts slightly, and move the door backward or forward, up or down as necessary. - Place a shop towel on the jack to prevent damage to the door when adjusting the door.
|
| 4. | Grease the pivot portions of the hinges indicated by the arrows. |
| 5. | Check for water leaks. |
Rear Door Trim
Components and components location
| Component Location |
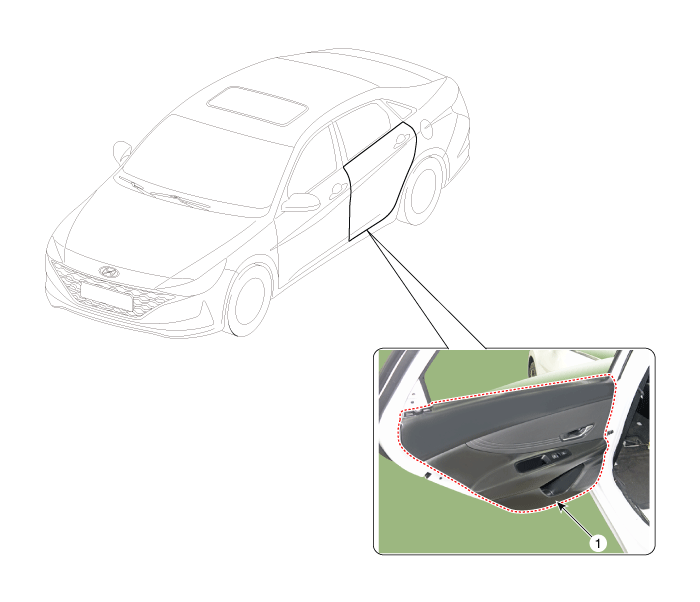
| 1. Rear door trim |
Repair procedures
| Replacement |
|

| 1. | Using a screwdriver or remover, remove the rear door delta inner cover (A).
|
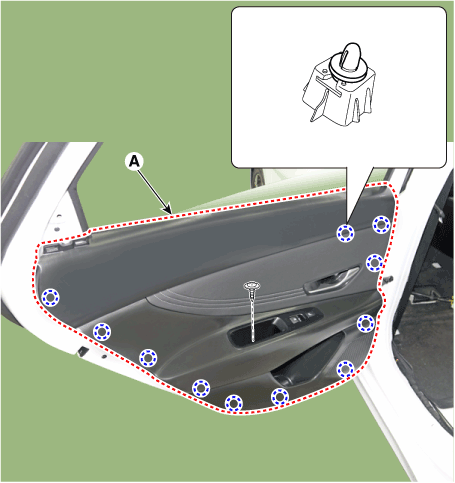
| 2. | After loosening the mounting screws, remove the rear door trim (A).
|
| 3. | Remove the rear door inside handle cage (A).
|
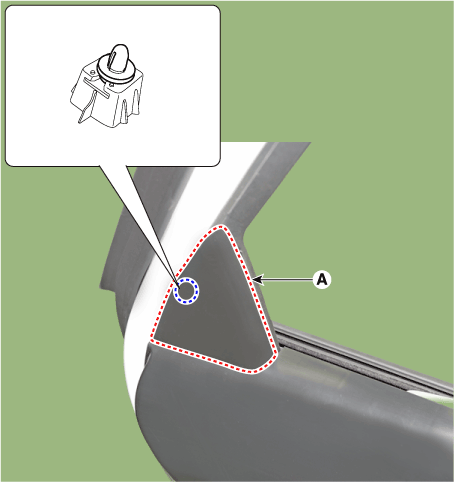
| 4. | Disconnect the power window switch connector (A).
|
| 5. | To install, reverse the removal procedure.
| ||||||||||||||||||
Rear Door Inside Handle
Repair procedures
| Replacement |
| 1. | Remove the rear door trim. (Refer to Rear Door - "Rear Door Trim") |
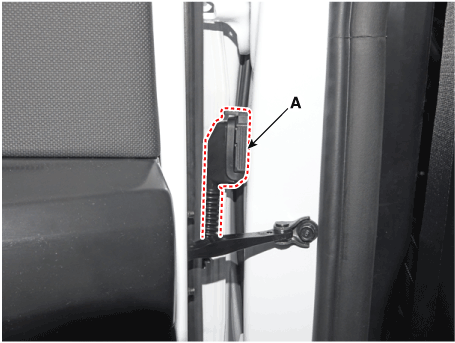
| 2. | After loosening the mounting screws, remove the rear door inside handle (A).
|
| 3. | To install, reverse the removal procedure.
|
Rear Door Window Glass
Components and components location
| Component Location |
| 1. Rear door window glass |
Repair procedures
| zReplacement |
| 1. | Remove the rear door trim. (Refer to Rear Door - "Rear Door Trim") |
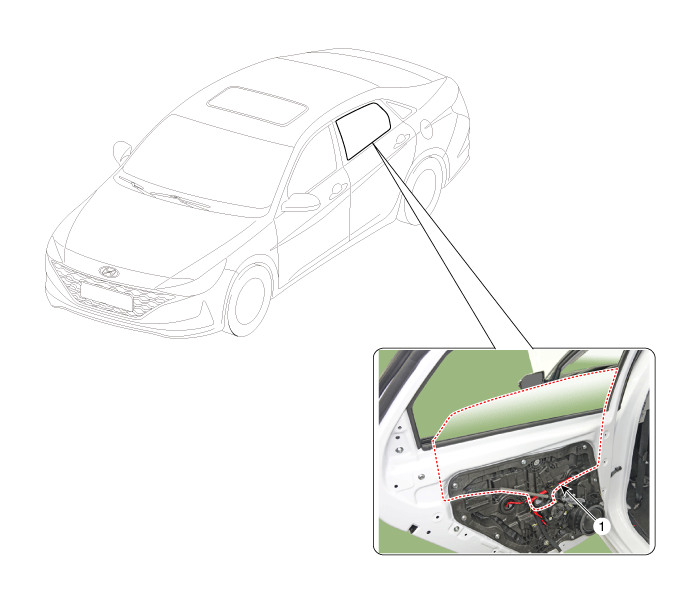
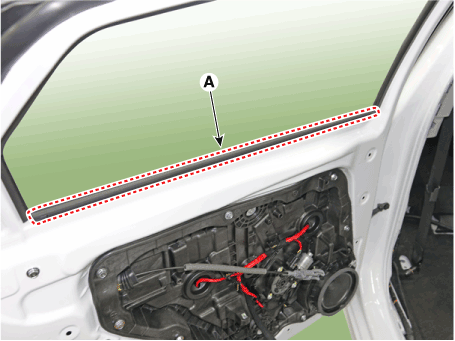
| 2. | Remove the rear door belt inside weatherstrip (A).
|
| 3. | Remove the rear door belt outside weatherstrip (A).
|
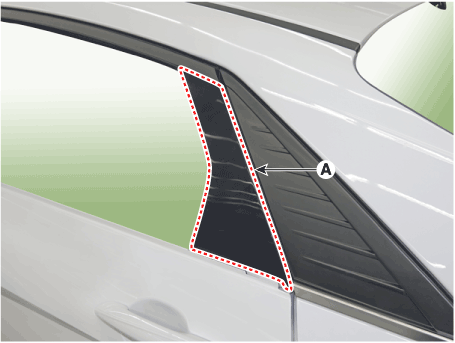
| 4. | Loosen the mounting screw, remove the rear door frame garnish (A).
|
| 5. | Loosen the mounting bolt and nuts, remove the rear door channel (A).
|
| 6. | Remove the rear door window glass mounting hole plug (A).
|
| 7. | Carefully adjust the rear door window glass (A) until the bolts are visible, then loosen them. Separate the glass from the glass run and carefully pull the glass out through the window slot.
|
| 8. | To install, reverse the removal procedure.
|
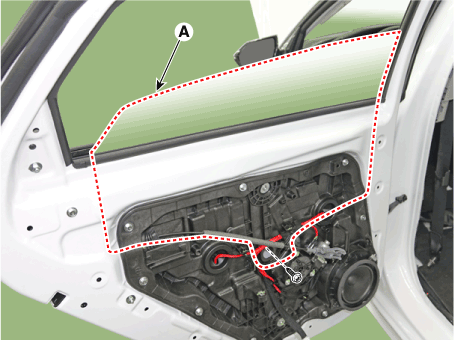
Rear Door Module
Components and components location
| Component Location |
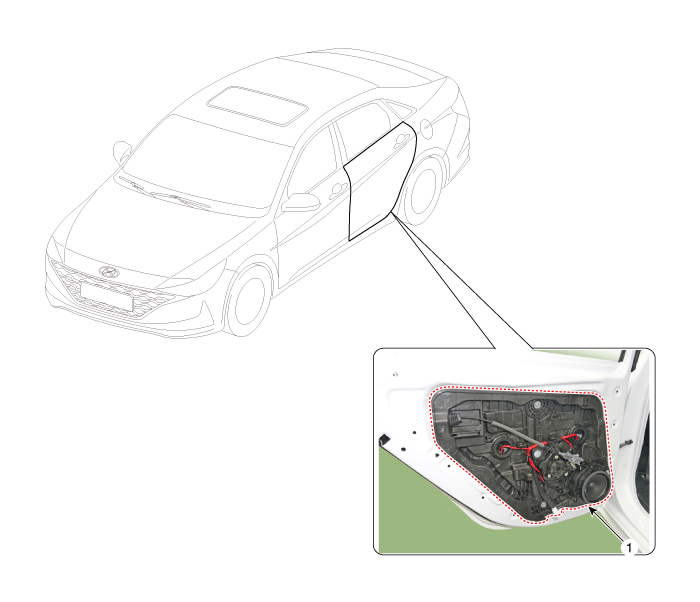
| 1. Rear door module |
Repair procedures
| Replacement |
| 1. | Remove the rear door window glass. (Refer to Rear Door - "Rear Door Window Glass") |
| 2. | Remove the rear door outside handle. (Refer to Rear Door - "Rear Door Outside Handle") |
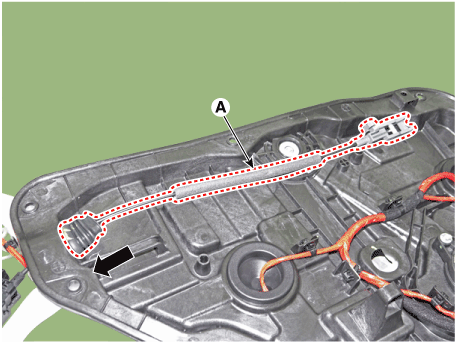
| 3. | Loosen the mounting bolt and nut, remove the rear door channel (A).
|
| 4. | Remove the outside handle pad (A).
|
| 5. | Loosen the rear door outside handle base mounting bolt (A).
|
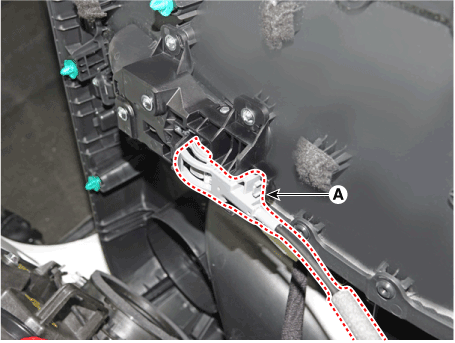
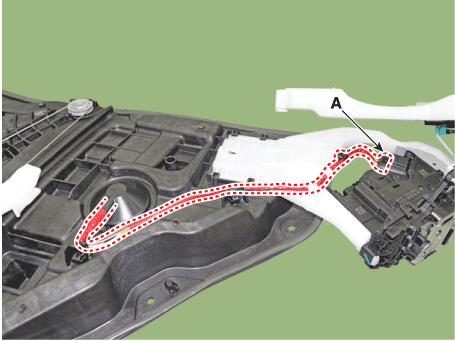
| 6. | Press the lock pin, sepatate the rear door main connector (A).
|
| 7. | 리Loosen the front door latch mounting screws.
|
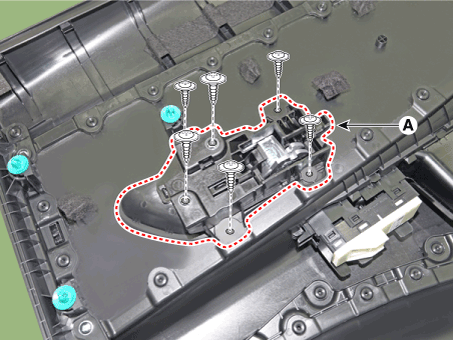
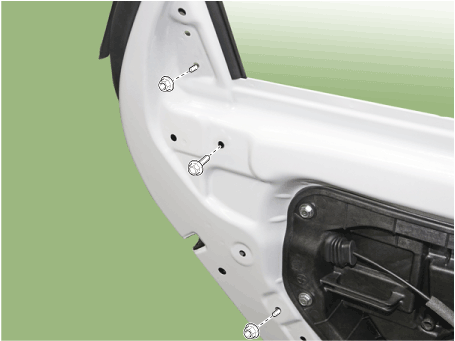
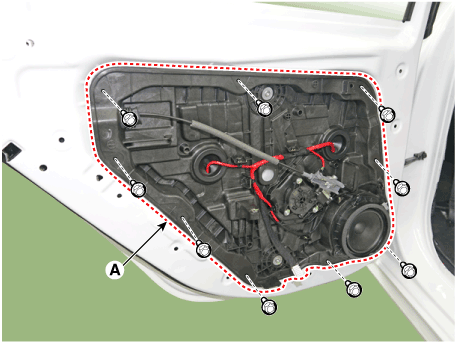
| 8. | Loosen the mounting bolts and remove the rear door module (A).
|
| 9. | To install, reverse the removal procedure.
|
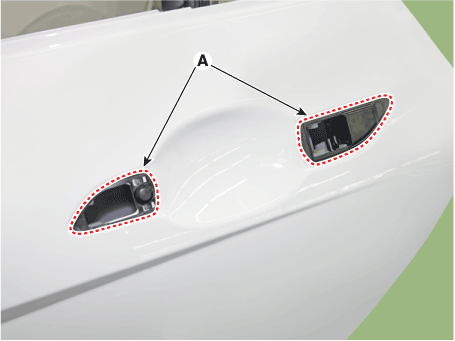
Rear Door Outside Handle
Components and components location
| Component Location |
| 1. Rear door outside handle |
Repair procedures
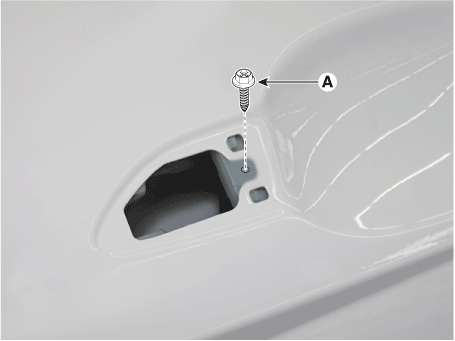
| Replacement |
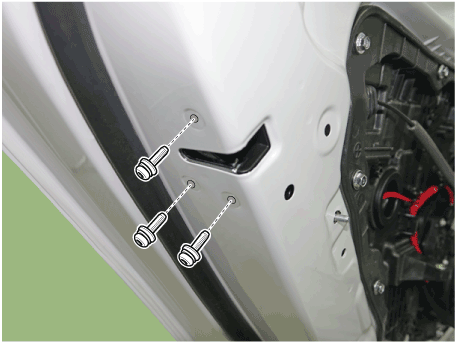
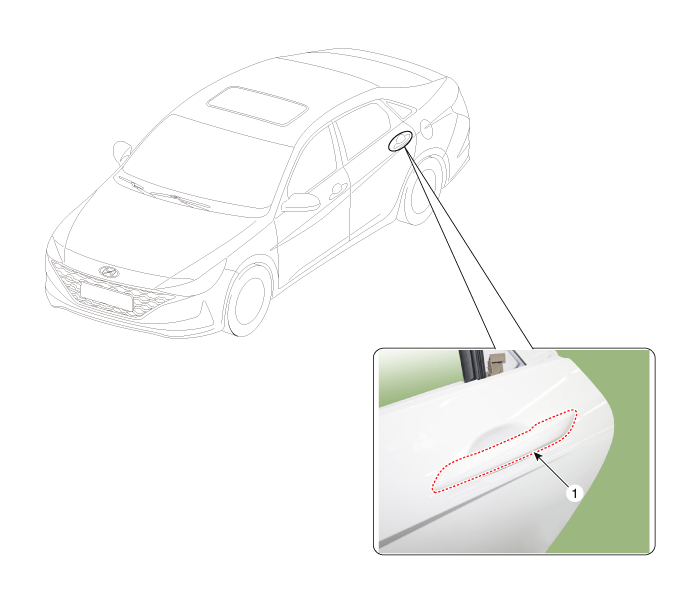
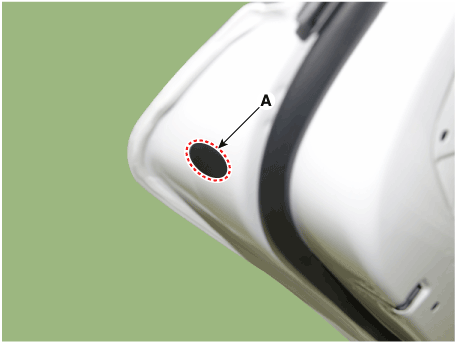
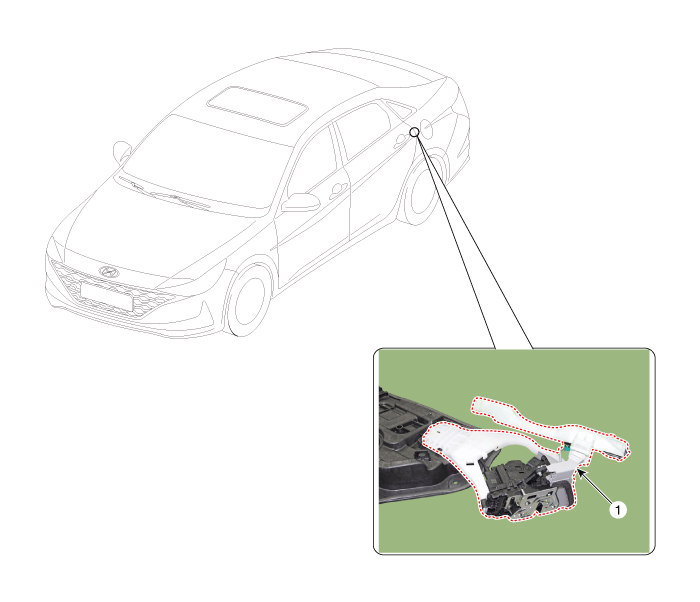
| 1. | Remove the plug hole (A).
|
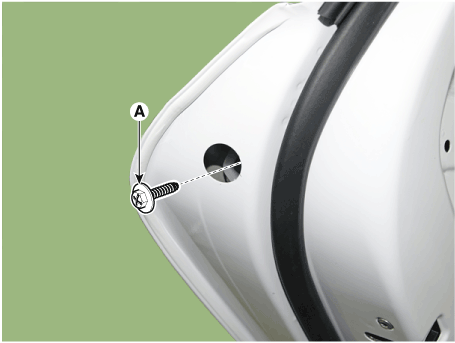
| 2. | Loosen the mounting screw (A) and then remove the rear door outside handle (B) by sliding it forward.
|
| 3. | To install, reverse the removal procedure.
|
Rear Door Belt Outside Weatherstrip
Repair procedures
| Replacement |
| 1. | Pull down the rear door window glass to the lowest level by pressing the power window glass switch. |
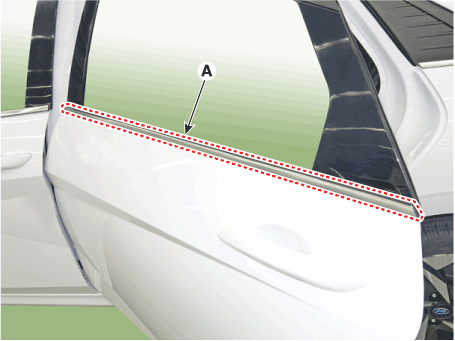
| 2. | Remove the rear door belt outside weatherstrip (A).
|
| 3. | To install, reverse the removal procedure.
|
Rear Door Belt Inside Weatherstrip
Repair procedures
| Replacement |
| 1. | Remove the rear door trim. (Refer to Rear Door - "Rear Door Trim") |
| 2. | Remove the rear door belt inside weatherstrip (A).
|
| 3. | To install, reverse the removal procedure.
|

Rear Door Side Weatherstrip
Repair procedures
| Replacement |
| [Rear door side weatherstrip] |
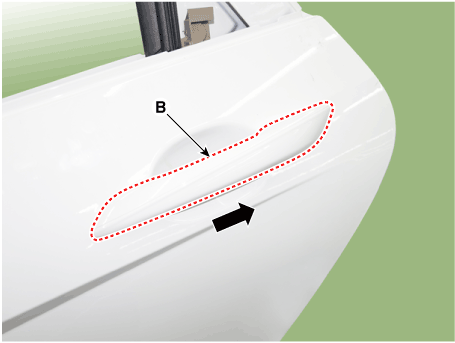
| 1. | Loosen the rear door checker (B) mounting bolt.
|
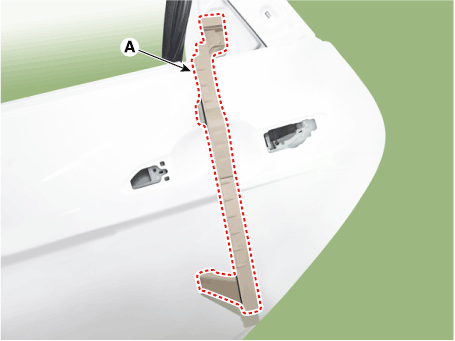
| 2. | Detach the clips, then remove the rear door side weatherstrip (A).
|
| 3. | To install, reverse the removal procedure.
|
| [Rear door body side weatherstrip] |
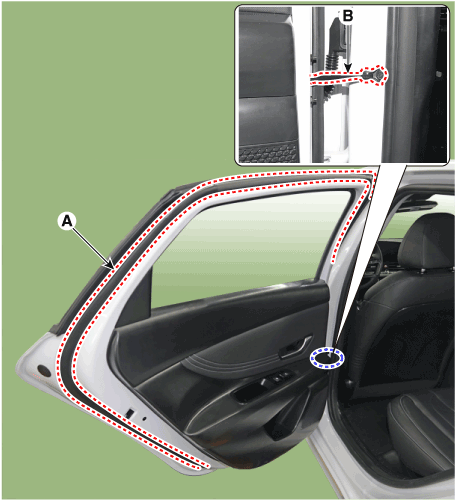
| 1. | Detach the clips, then remove the rear door body side weatherstrip (A). [LH]
[RH]
|
| 2. | To install, reverse the removal procedure.
|
Rear Door Latch
Components and components location
| Component Location |
| 1. Rear door latch |
Repair procedures
| Replacement |
| 1. | Remove the rear door module. (Refer to Rear Door - "Rear Door Module") |
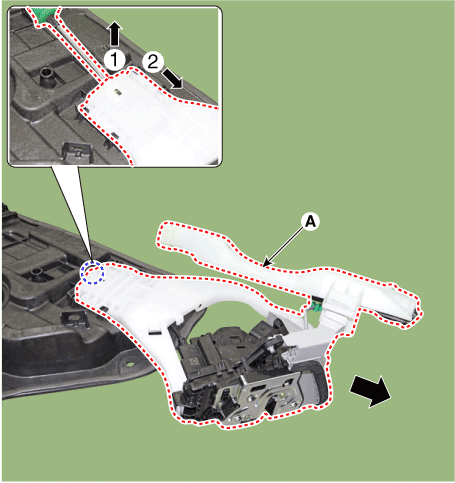
| 2. | Remove the rear door inside handle cage (A) by pulling it in the direction of the arrow.
|
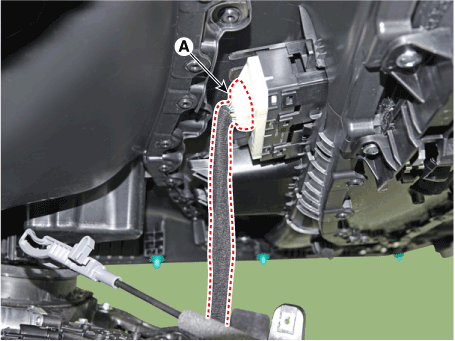
| 3. | Separate the rear door outside handle connector wiring harness (A).
|
| 4. | Remove the rear door latch assembly (A) by pulling it in the direction of the arrow.
|
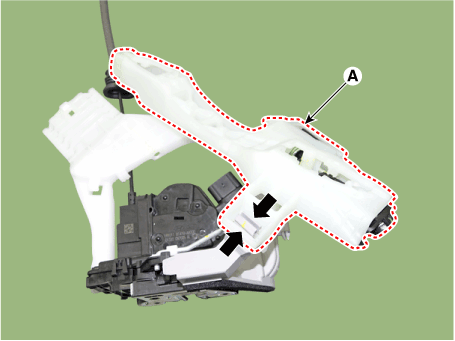
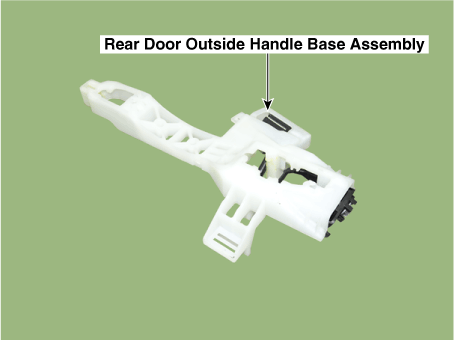
| 5. | Remove the rear door outside handle base (A) by pushing in the lock pins located in the back.
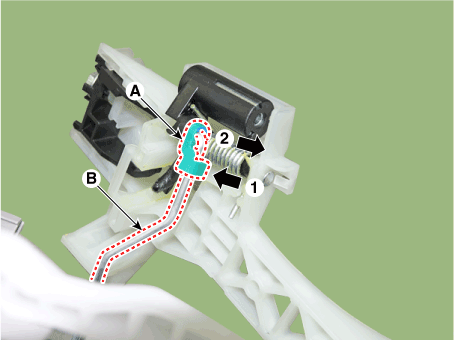
|
| 6. | Slide the locking pin (A) in the direction of the arrow to release the lock and then remove the rod (B).
|
| 7. | To install, reverse the removal procedure.
|


