Components and components location
| [This illustration shows the LHD type. RHD type is symmetrical.] |
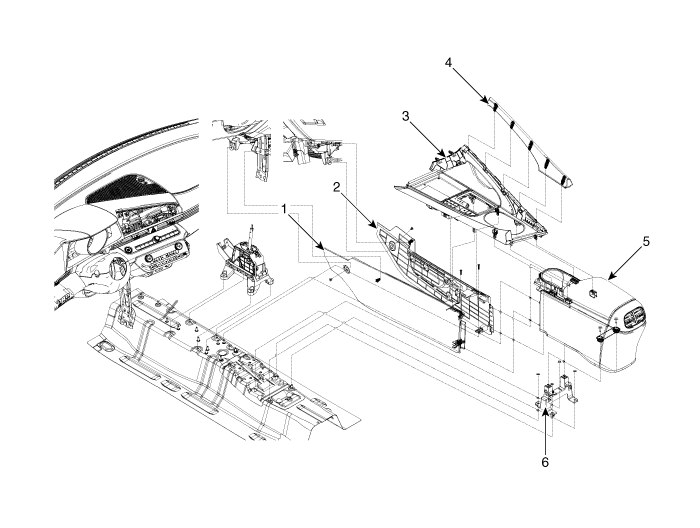
1. Floor console side cover [LH]
2. Floor console side cover [RH]
3. Floor console upper cover
| 4. Floor console side garnish
5. Floor console assembly
6. Floor console rear mounitng bracket
|
Floor Console Assembly
Components and components location
| [This illustration shows the LHD type. RHD type is symmetrical.] |
[AT]

1. Floor console assembly
|
|
[MT]
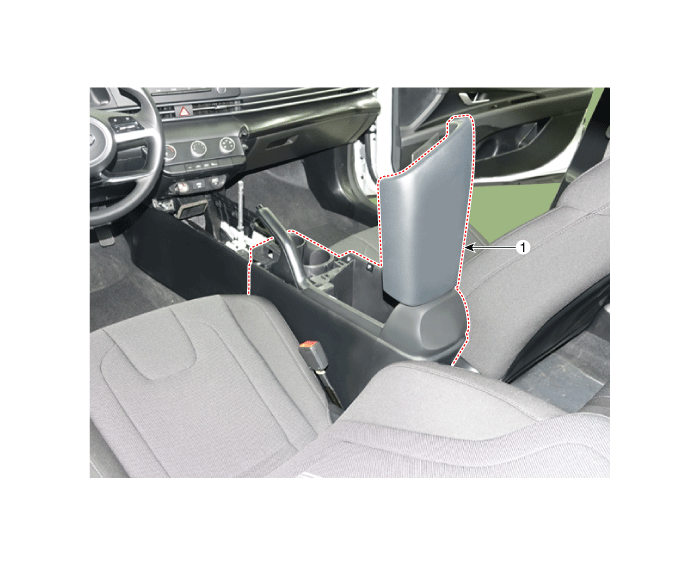
1. Floor console assembly
|
|
Repair procedures
[AT]
| •
| When removing with a flat - tip screwdriver or remover, wrap protective tape around the tools to prevent damage to components. |
| •
| Put on gloves to prevent hand injuries. |
|
| •
| Take care not to bend or scratch the trim and panels. |
|
| 1. | To remove the gear knob & gear boots (A) pull both of it up. [General type] 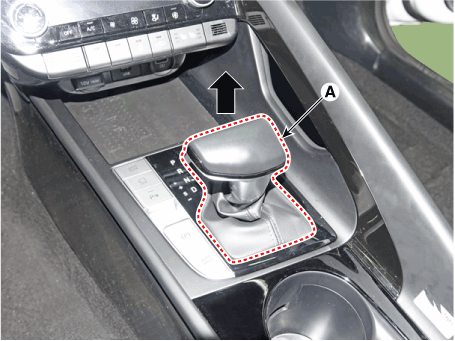
[N Line] 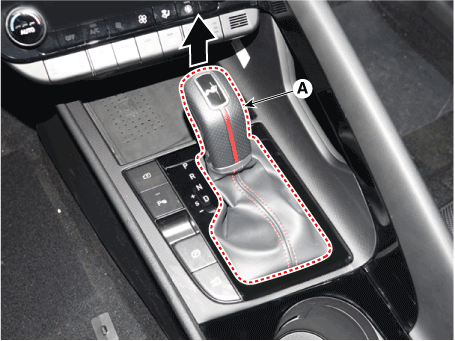
|
| 2. | Using a screwdriver or remover, remove the floor console side garnish (A). 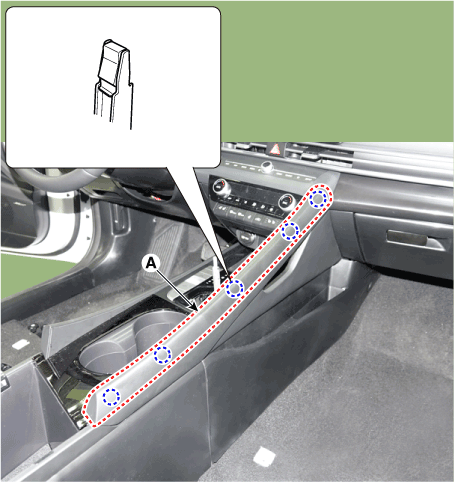
|
| 3. | After loosening the mounting screw and then using a screwdriver or remover, remove the console upper cover (A). 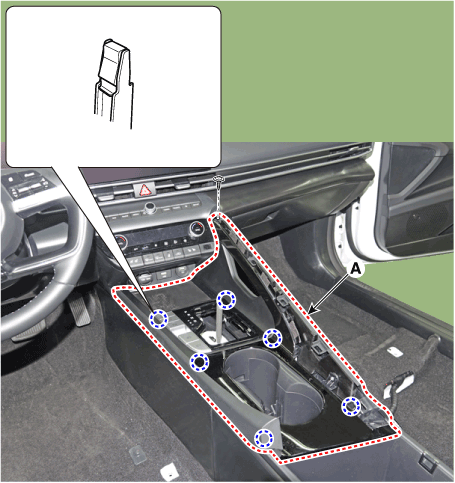
|
| 4. | Press the lock pin separate the console upper cover connector (A). 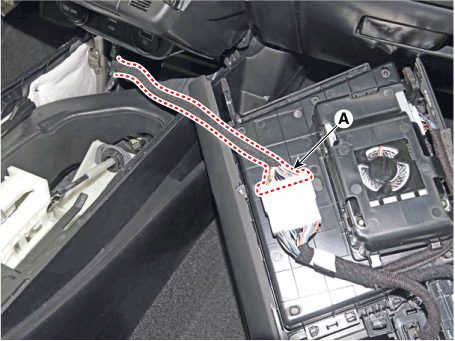
|
| 5. | Remove the storage box pad (A). 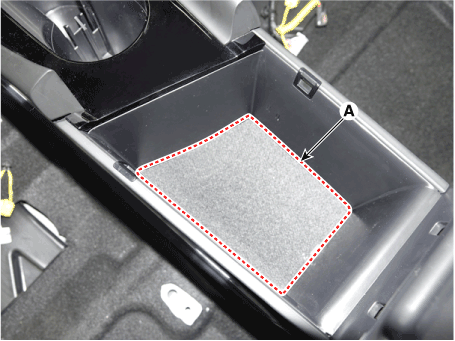
|
| 6. | After loosening the mounting screws and bolts, remove the floor console assembly (A). 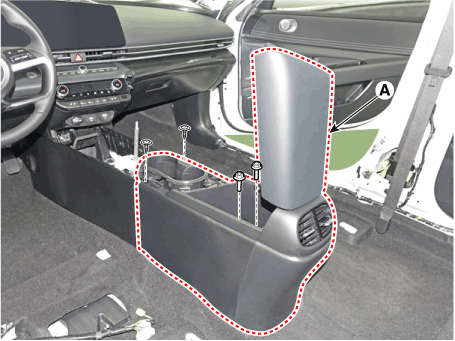
|
| 7. | To install, reverse the removal procedure. | •
| Make sure the connector is connected properly. |
| •
| Replace any damaged clips (or pin - type retainers). |
|
|
| [Floor console side cover] |
| •
| When removing with a flat - tip screwdriver or remover, wrap protective tape around the tools to prevent damage to components. |
| •
| Put on gloves to prevent hand injuries. |
|
| •
| Take care not to bend or scratch the trim and panels. |
|
| 1. | Remove the floor console assembly. (Refer to Floor console - "Floor Console Assembly") |
| 2. | After loosening the mounting clip (A) and screw, remove the floor console side cover (B). [LH] 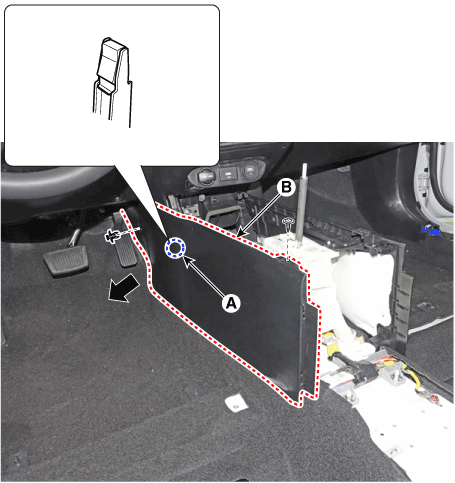
[RH] 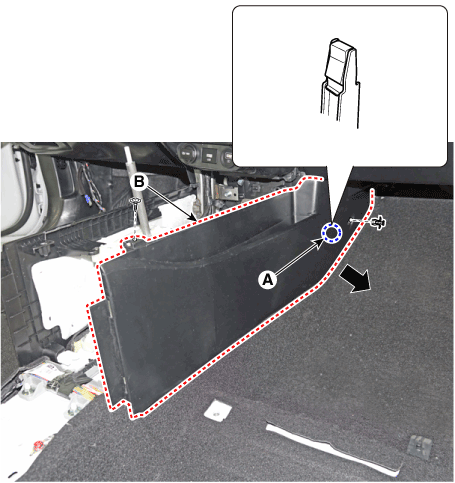
|
| 3. | To install, reverse the removal procedure. | •
| Replace any damaged clips (or pin - type retainers). |
|
|
[MT]
| •
| When removing with a flat - tip screwdriver or remover, wrap protective tape around the tools to prevent damage to components. |
| •
| Put on gloves to prevent hand injuries. |
|
| •
| Take care not to bend or scratch the trim and panels. |
|
| 1. | Remove the gear knob & boots (A) pull both of it up. 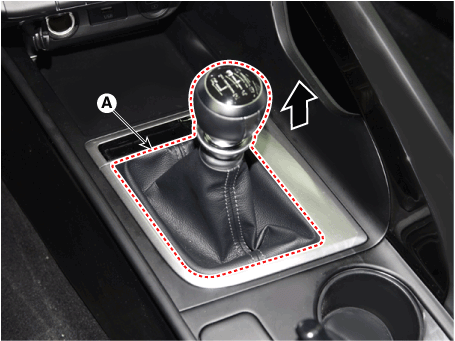
|
| 2. | Using a screwdriver or remover, remove the floor console side garnish (A). 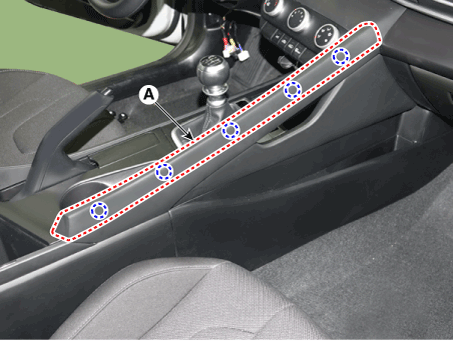
|
| 3. | Using a screwdriver or remover, remove the parking brake cover (A). 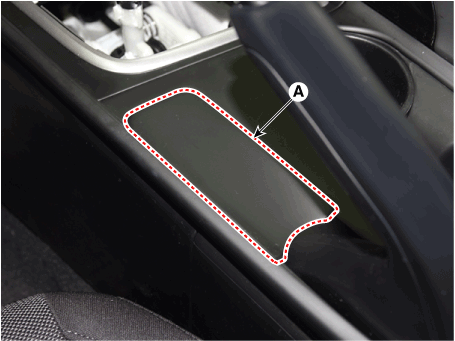
|
| 4. | After loosening the mounting screw and then using a screwdriver or remover, remove the console upper cover (A). 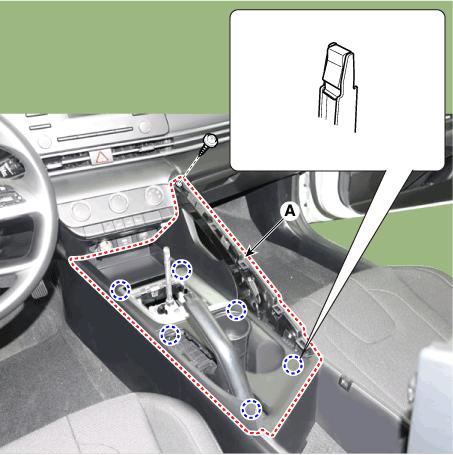
|
| 5. | Remove the storage box pad (A). 
|
| 6. | After loosening the mounting screws and bolts, remove the floor console assembly (A). 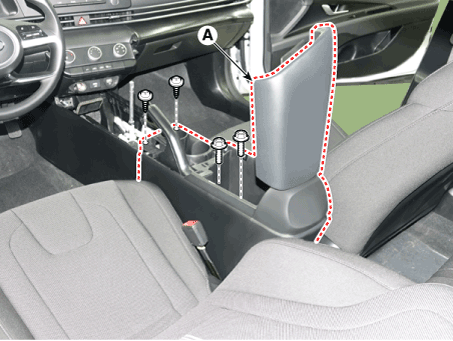
|
| 7. | To install, reverse the removal procedure. | •
| Replace any damaged clips (or pin - type retainers). |
|
|
| [Floor console side cover] |
| •
| When removing with a flat - tip screwdriver or remover, wrap protective tape around the tools to prevent damage to components. |
| •
| Put on gloves to prevent hand injuries. |
|
| •
| Take care not to bend or scratch the trim and panels. |
|
| 1. | Remove the floor console assembly. (Refer to Floor console - "Floor Console Assembly") |
| 2. | After loosening the mounting clip and screw, remove the floor console side cover (A). [LH] 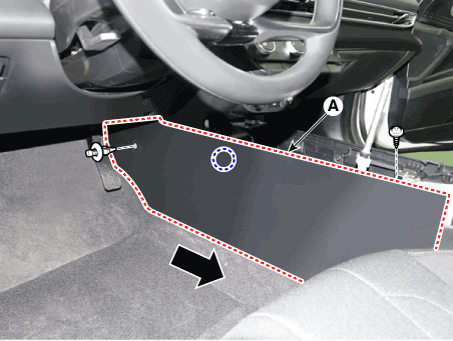
[RH] 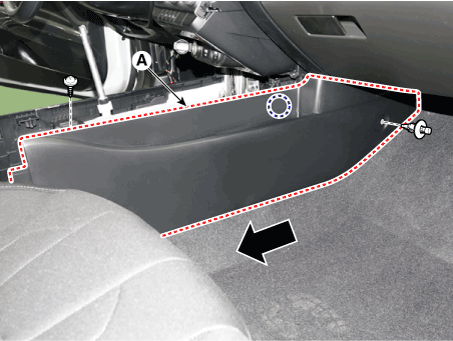
|
| 3. | To install, reverse the removal procedure. | •
| Replace any damaged clips (or pin - type retainers). |
|
|
Rear Console Cover
Components and components location
| [This illustration shows the LHD type. RHD type is symmetrical.] |
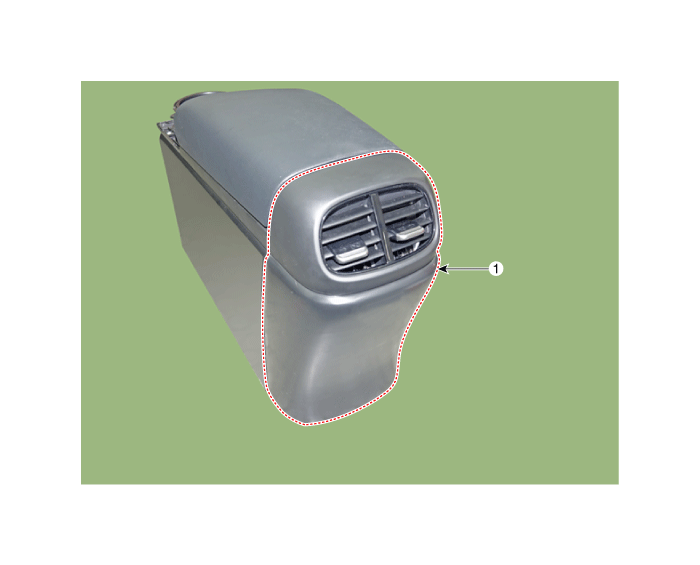
Repair procedures
| •
| When removing with a flat - tip screwdriver or remover, wrap protective tape around the tools to prevent damage to components. |
| •
| Put on gloves to prevent hand injuries. |
|
| •
| Take care not to bend or scratch the trim and panels. |
|
| 1. | Remove the floor console assembly. (Refer to Floor Console - "Floor Console Assembly") |
| 2. | Using a screwdriver or remover, remove the rear console cover (A). 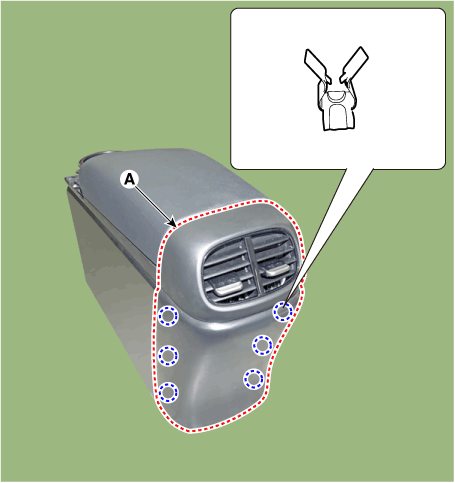
|
| 3. | To install, reverse the removal procedure. | •
| Replace any damaged clips (or pin - type retainers). |
|
|
Console Armrest
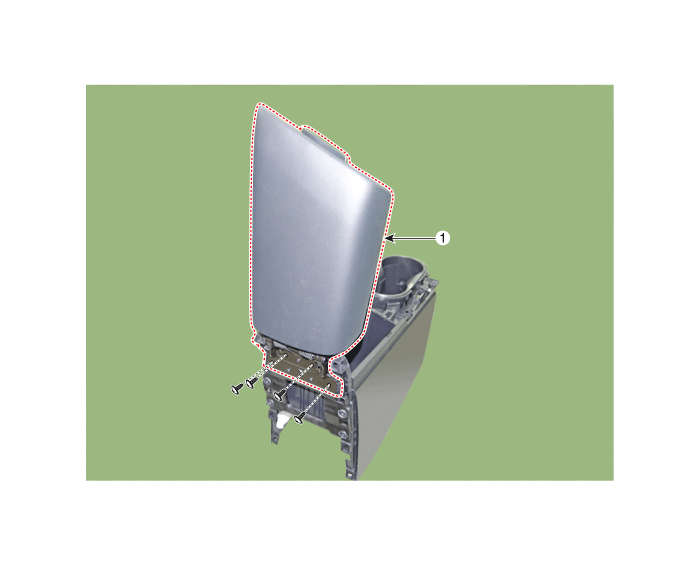
Components and components location
[This illustration shows the LHD type. RHD type is symmetrical.]
Repair procedures
| •
| When removing with a flat - tip screwdriver or remover, wrap protective tape around the tools to prevent damage to components. |
| •
| Put on gloves to prevent hand injuries. |
|
| •
| Take care not to bend or scratch the trim and panels. |
|
| 1. | Remove the floor console assembly. (Refer to Floor Console - "Floor Console Assembly") |
| 2. | Remove the rear console cover. (Refer to Floor Console - "Rear Console Cover") |
| 3. | Loosen the mounting screws and remove the console armrest (A). 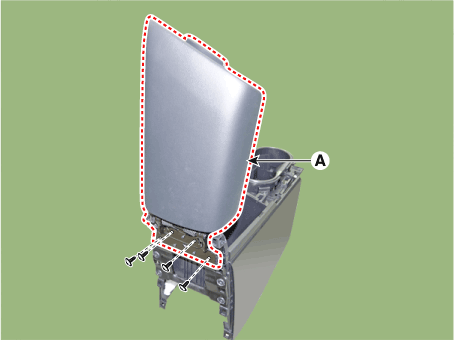
|
| 4. | To install, reverse the removal procedure. | •
| Replace any damaged clips (or pin - type retainers). |
|
|
Components and components location
Component Location 1. Cowl top cover
Repair procedures
Replacement1.Remove the plug hole (A).2.Loosen the mounting nuts and remove the wiper arm (A). ...
Components and components location
Components[This illustration shows the LHD type. RHD type is symmetrical.]1. Crash pad assembly2. Crash pad lower panel3. Crash pad side cover [LH]4. Crash pad si ...
 Hyundai Elantra CN7: Floor Console


