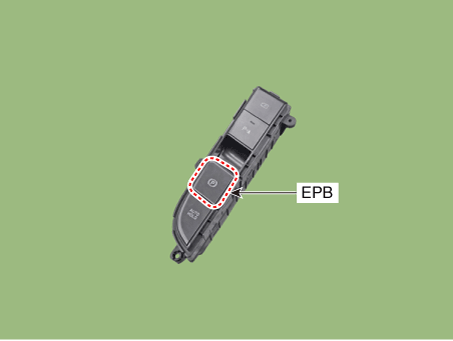
 Hyundai Elantra CN7: Parking Brake System
Components and components location
| Components |
[G 1.6 MPI / LPI]
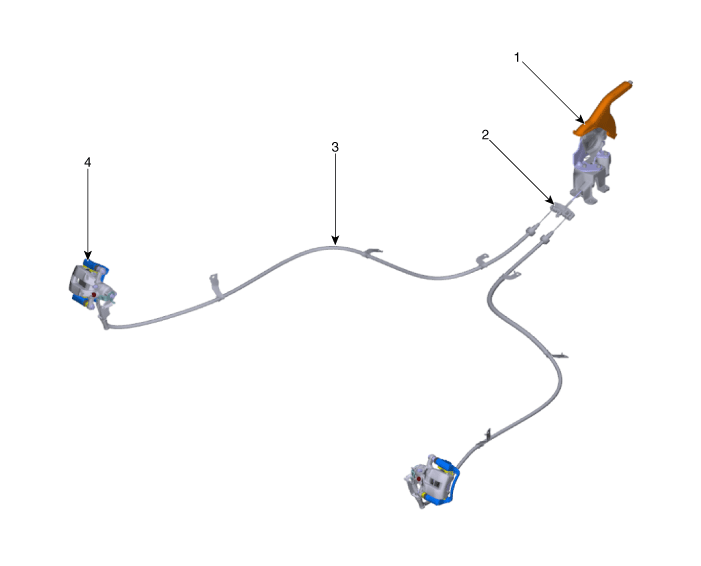
| 1. Parking brake lever 2. Equalizer assembly | 3. Parking brake cable 4. Rear caliper |
[G 1.6 T-GDI]
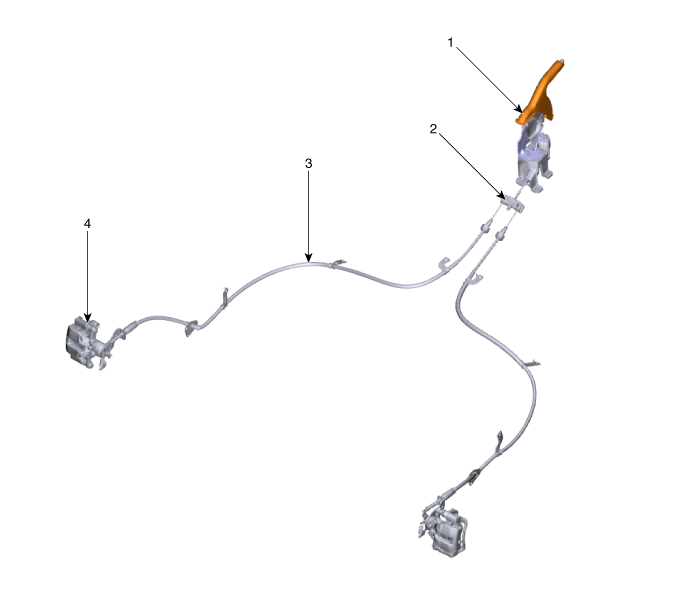
| 1. Parking brake lever 2. Equalizer assembly | 3. Parking brake cable 4. Rear caliper |
Parking Brake Lever
Repair procedures
| Removal |
| 1. | Turn ignition switch OFF and disconnect the negative (-) battery cable. |
| 2. | Release the parking brake. |
| 3. | Remove the floor console assembly. (Refer to Body - "Floor Console") |
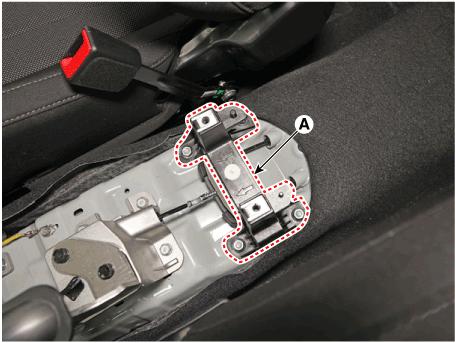
| 4. | Remove the floor console mounting bracket (A).
|
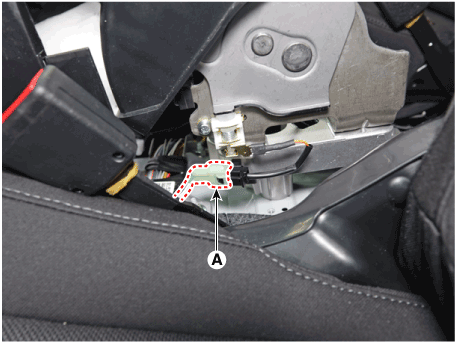
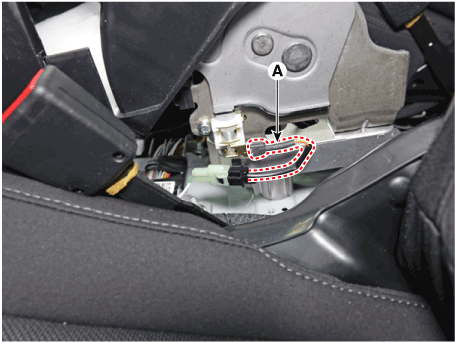
| 5. | Disconnect the parking brake switch connector (A).
|
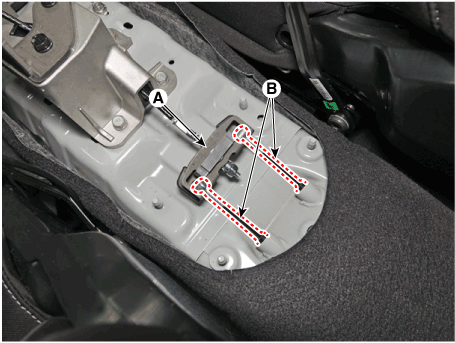
| 6. | Disconnect the parking brake cable (B) from the equalizer assembly (A).
|
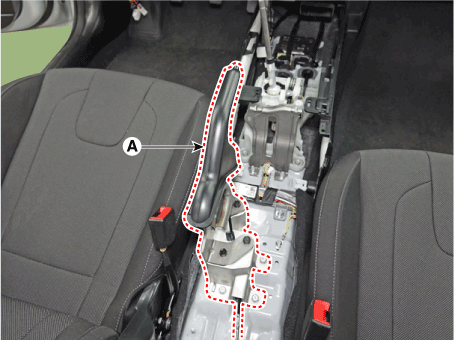
| 7. | Remove the parking brake lever assembly (A) after loosening the parking brake lever mounting bolts.
|
| Installation |
| 1. | Install the parking brake lever assembly (A).
|
| 2. | Install the parking brake cable (B) in the equalizer assembly (A).
|
| 3. | Apply a coating of the specified grease to each sliding parts (A) of the ratchet plate or the ratchet pawl.
|
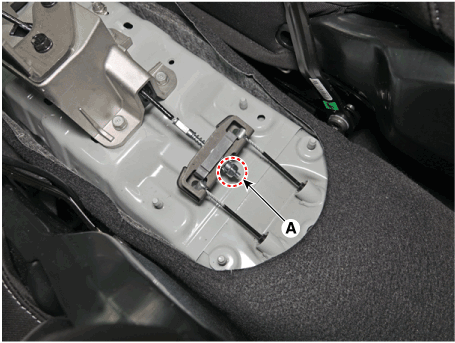
| 4. | Install the parking brake cable adjuster, then adjust the parking brake lever stroke by turning adjusting nut (A).
|
| 5. | Connect the parking brake switch connector (A).
|
| Adjustment |
| 1. | Remove the floor console assembly. (Refer to Body - "Floor Console") |
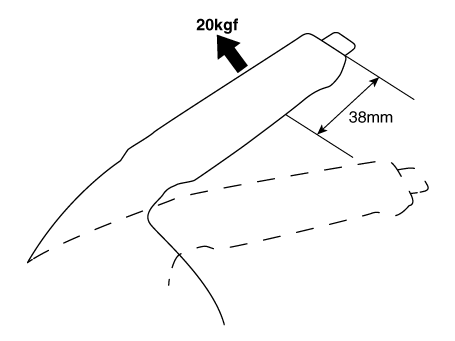
| 2. | After bleeding, the brake pedal is operated 20 times with a force of 10 kgf or more, and the parking brake lever is operated more than 3 times to full stroke to secure the cable. |
| 3. | Install the parking brake cable adjuster, then adjust the parking brake lever stroke by turning adjusting nut (A).
|
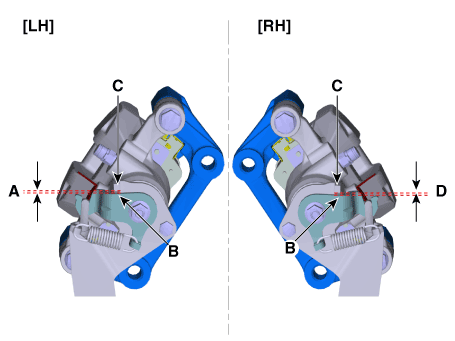
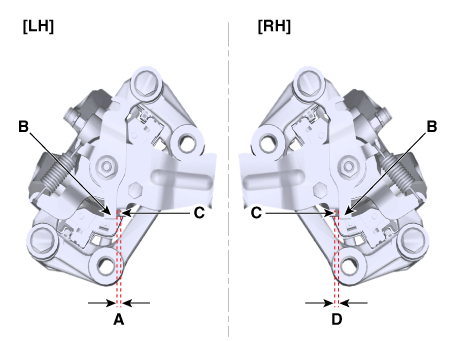
| 4. | Fasten the adjusting nut and tighten the parking brake cable until the sum of distance (A and D) from the stopping point to the activating lever (B) and to stopper (C) is less than 3 mm.
[G 1.6 MPI / LPI]
[G 1.6 T-GDI]
|
| 5. | Release the parking brake lever fully, and check that parking brakes do not drag when the rear wheels are turned. Readjust if necessary. |
| 6. | Make sure that the parking brakes are fully applied when the parking brake lever is pulled up fully. |
| 7. | Install the floor console. (Refer to Body - "Floor Console") |
Parking Brake Switch
Repair procedures
| Removal |
| 1. | Turn ignition switch OFF and disconnect the negative (-) battery cable. |
| 2. | Release the parking brake. |
| 3. | Remove the floor console assembly. (Refer to Body - "Floor Console") |
| 4. | Disconnect the parking brake switch connector (A).
|
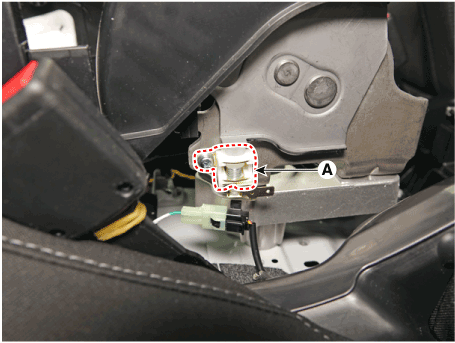
| 5. | Remove the parking brake switch (A) after loosening the screw.
|
| Installation |
| 1. | To install, reverse the removal procedures. |
Parking Brake Cable
Repair procedures
| Removal |
| 1. | Turn ignition switch OFF and disconnect the negative (-) battery cable. |
| 2. | Release the parking brake. |
| 3. | Remove the floor console assembly. (Refer to Body - "Floor Console") |
| 4. | Loosen the adjusting nut (A) of parking brake cable adjuster.
|
| 5. | Disconnect the parking brake cable (B) from the equalizer assembly (A).
|
| 6. | Loosen the wheel nuts slightly. Raise the vehicle, and make sure it is securely supported. |
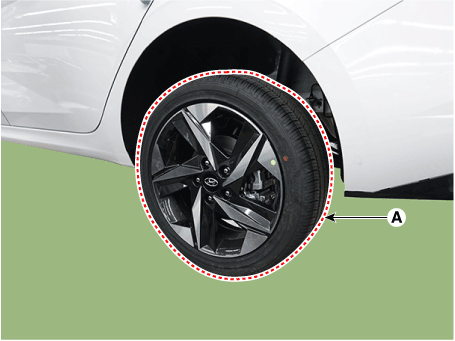
| 7. | Remove the rear wheel and tire (A) from the rear hub.
|
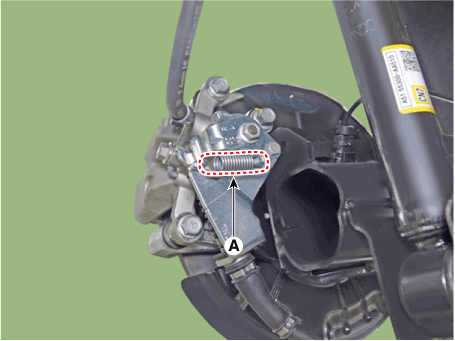
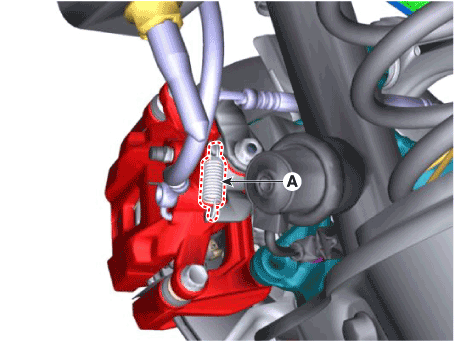
| 8. | Remove the return spring (A). [Rear torsion beam type]
[Rear multi link type]
|
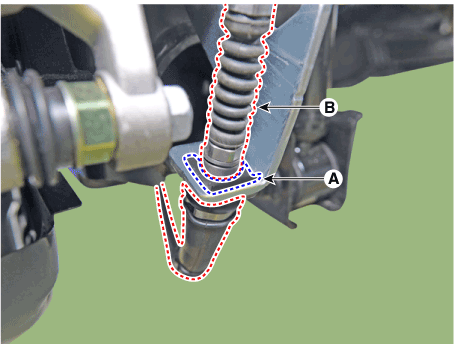
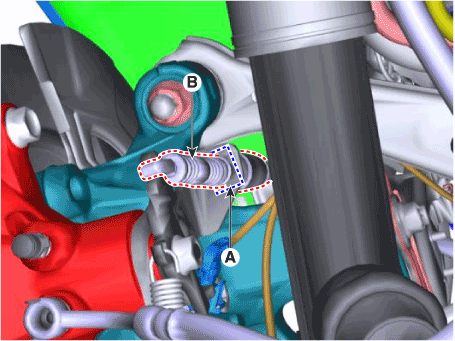
| 9. | Disconnect the parking cable (B) after remove the parking brake cable fixing clip (A). [Rear torsion beam type]
[Rear multi link type]
|
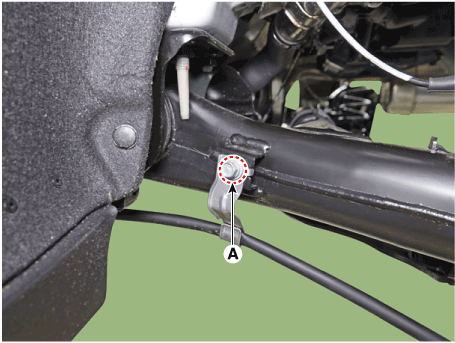
| 10. | Remove the parking brake cable bracket after loosening the mounting bolt (A).
[Rear torsion beam type]
|
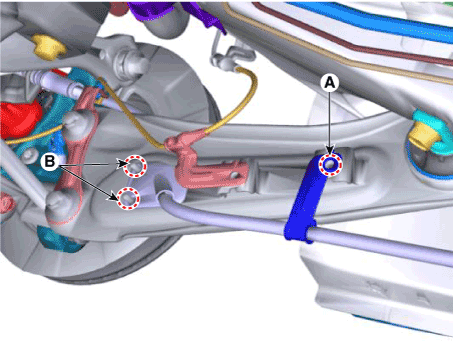
| 11. | Remove the parking brake cable bracket after loosening the mounting bolt (A) and nuts (B). [Rear multi link type]
|
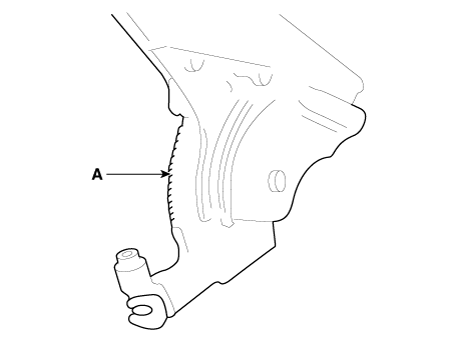
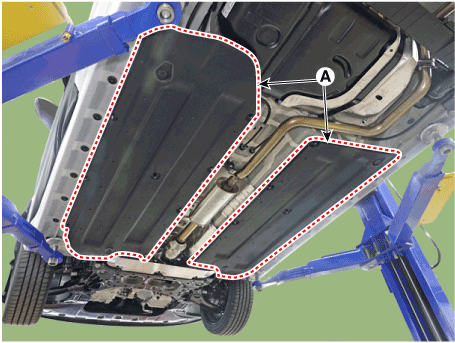
| 12. | Remove the floor under cover (A).
|
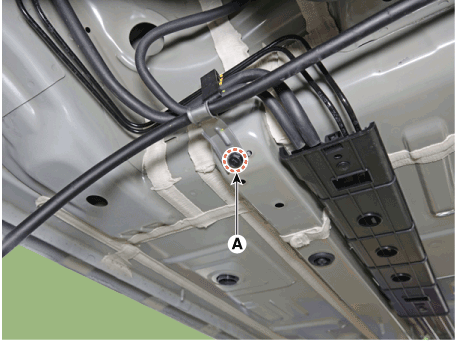
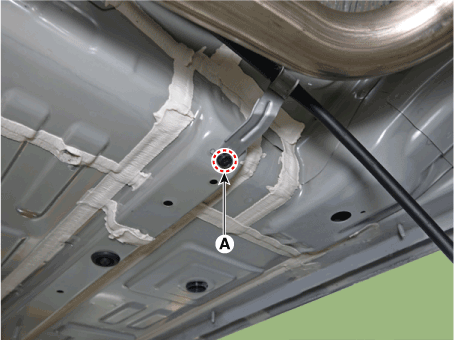
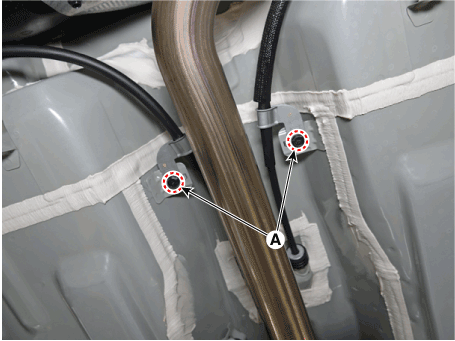
| 13. | Remove the parking brake cable bracket mounting bolt (A).
[LH]
[RH]
|
| 14. | Remove the parking brake cable after loosening the mounting bolts (A).
|
| Installation |
| 1. | To install, reverse the removal procedures. |
| 2. | Fasten the adjusting nut and tighten the parking brake cable until the sum of distance (A and D) from the stopping point to the activating lever (B) and to stopper (C) is less than 3 mm.
|
| 3. | Release the parking brake lever fully, and check that parking brakes do not drag when the rear wheels are turned. Readjust if necessary. |
| 4. | Make sure that the parking brakes are fully applied when the parking brake lever is pulled up fully. |
Electronic Parking Brake (EPB)
Description and operation
| Description |
The electronic parking brake (EPB) is different from existing parking systems which operated with the brake pedal or the lever type. The EPB system sends the signal to the ECU when a driver operates the EPB switch. The ECU operates the EPB actuator composed with motor gears. The braking power is caused by occurs when the motor pulls the cable connected the brake system.
The EPB ECU is one of the parts of EPB system. It perceives the signal of the various sensor of system, executes a self diagnosis, controls EPB system with the logic.
Main Function
| 1. | Static Braking Mode The operation and the cancellation at the stop condition of the vehicle
|
| 2. | Dynamic Braking Function Dynamic Braking Function (DBF) : The DBF is the braking function at the driving condition, it can operate the EPB system and cancel it at the vehicle driving condition. This function will be used while foreign materials get in between the brake pedal or the brake hydraulic line can not be operated.
|
| 3. | Drive Away Release Convenient for drivers, EPB is automatically released when driver shift from P into another (R/N/D/S) during braking. |
| 4. | Latching Run This is reconnection function to operate EPB normally after emergency release. Operation
|
| 5. | Bedding Mode You must do "Bedding in process" for optimizing the initial operation performance of EPB after replacing the parking brake shoe and rear brake disc. Bedding in Process
|
| 6. | AVH (Automatic Vehicle Hold) AVH supports to keep a stop condition of the vehicle by hydraulic brake at a stop.
|
Warning Lamp
| 1. | EPB warning lamp EPB warning lamp indicates the EPB cut and malfunction. EPB warning lamp comes ON below cases.
|
| 2. | AUTO HOLD lamp / AUTO HOLD function lamp
|
Components and components location
| Components |
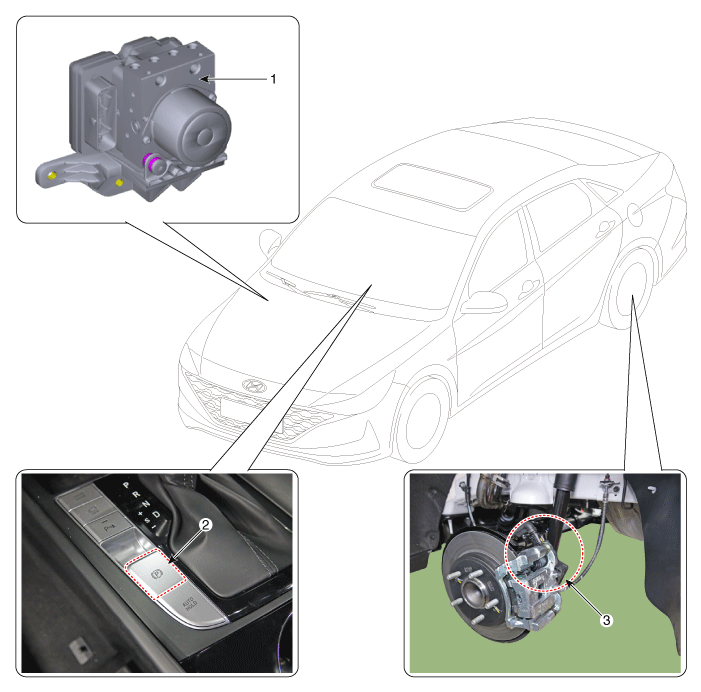
| 1. ESC Control Module 2. EPB switch | 3. Electronic Parking Brake (EPB) actuator |
Schematic diagrams
| Circuit Diagram |
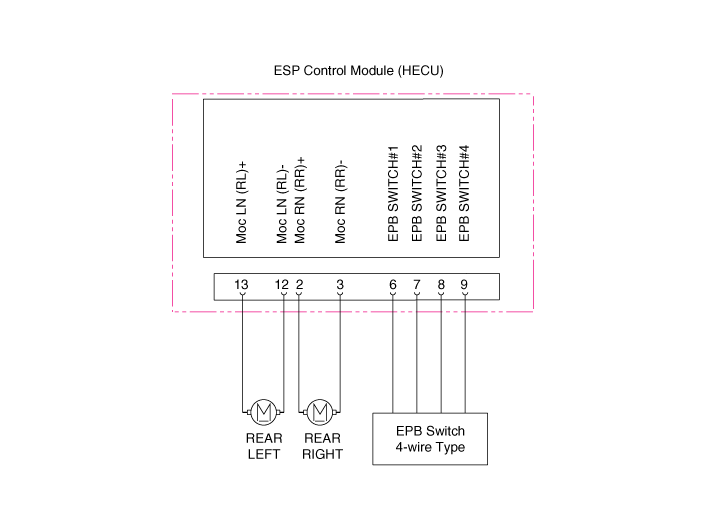
| Terminal Function |
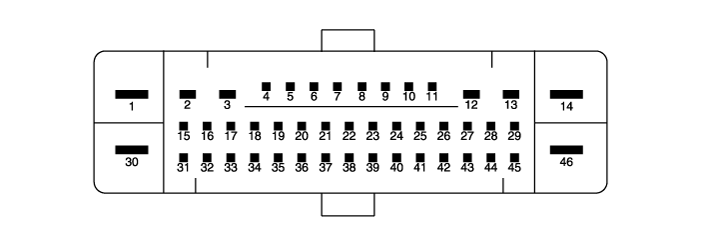
|
Pin No
|
Fuction
|
Pin No
|
Fuction
|
| 6 | Electrical parking brake signal 1 | 2 | Rear right EPB motor power |
| 7 | Electrical parking brake signal 2 | 3 | Rear right EPB motor ground |
| 8 | Electrical parking brake signal 3 | 12 | Rear left EPB motor ground |
| 9 | Electrical parking brake signal 4 | 13 | Rear left EPB motor power |
Repair procedures
| Removal |
| 1. | Turn ignition switch OFF and disconnect the negative (-) battery cable. |
| 2. | Remove the console upper cover. (Refer to Body (Interior and Exterior) - "Floor Console") |
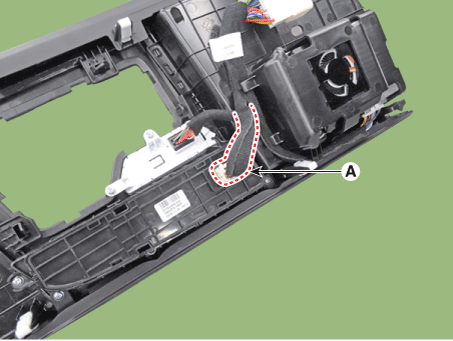
| 3. | Disconnet the EPB switch connetor (A).
|
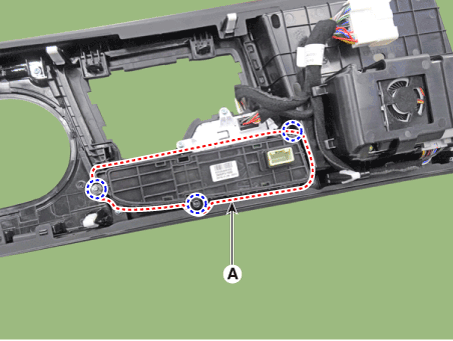
| 4. | Remove the EPB switch (A) after loosening screw.
|
[EPB Actuator]
| 1. | Turn ignition switch off and disconnect the battery (-) cable from the battery. |
| 2. | Remove the rear wheel and tire. |
| 3. | Remove the EPB actuator from rear caliper. (Refer to Brake System - "Rear Disc Brake") |

