Components and components location
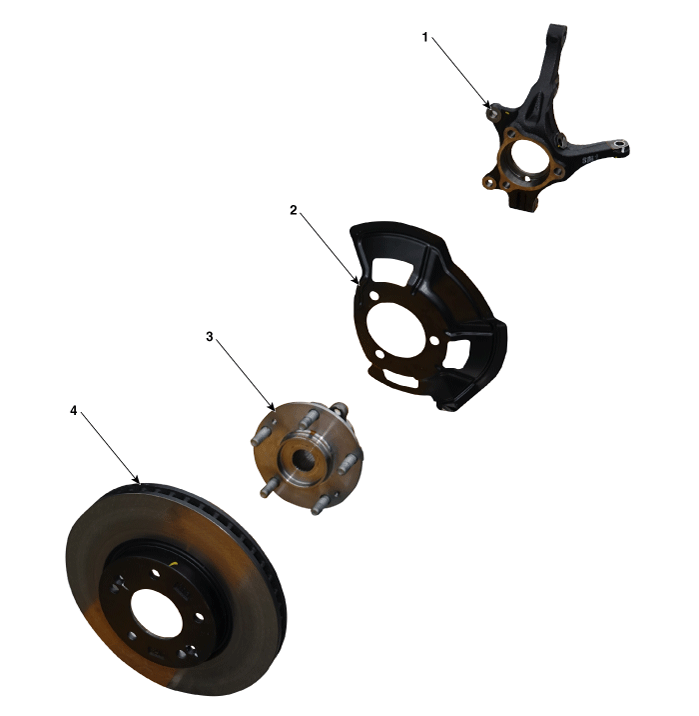
1. Front knuckle
2. Dust cover
| 3. Hub bearing
4. Brake disc
|
Repair procedures
| 1. | Loosen the wheel nuts slightly. Raise the vehicle, and make sure it is securely supported. |
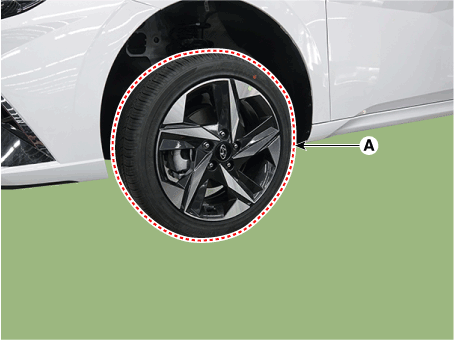
| 2. | Remove the front wheel and tire (A) from the front hub. Tightening torque : 107.9 - 127.5 N.m (11.0 - 13.0 kgf.m, 79.6 - 94.0 lb-ft) |
| •
| Be careful not to damage the hub bolts when removing the front wheel and tire (A). |
|
|
| 3. | Remove the front brake caliper. (Refer to Brake System - "Front Disc Brake") |
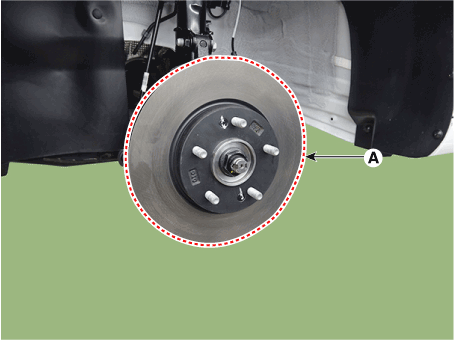
| 4. | Loosen the screw and the remove the front disc (A). Tightening torque : 4.9 - 5.9 N.m (0.5 - 0.6 kgf.m, 3.6 - 4.3 lb-ft) |
|
| 5. | By hammering on a chisel, unlock the driveshaft lock hub nut caulking. 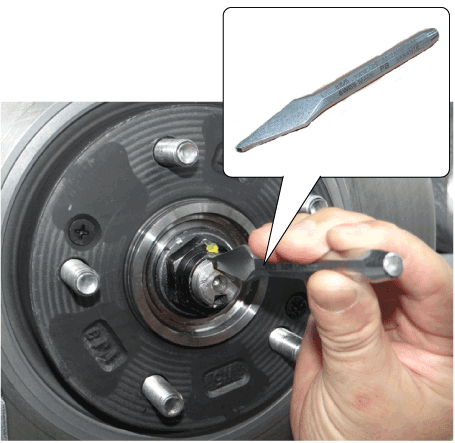
| •
| If there is screw thread (A) on the end of the nut, unlock the caulking by using a chisel and then loosen the nut to prevent damaging driveshaft screw thread. 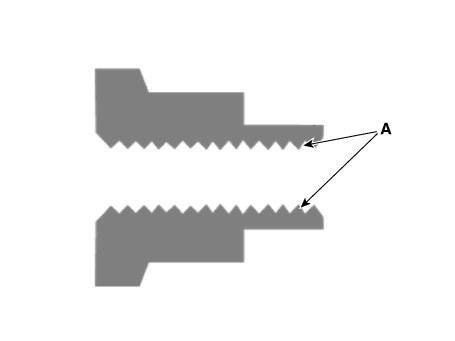
|
|
|
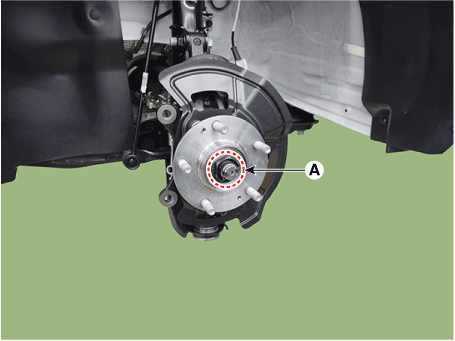
| 6. | Loosen the driveshaft caulking nut (A) from the front hub. Tightening torque : 274.6 - 294.2 N.m (28.0 - 30.0 kgf.m, 202.5 - 217.0 lb-ft) |
| •
| The driveshaft lock nut must be replaced with new one. 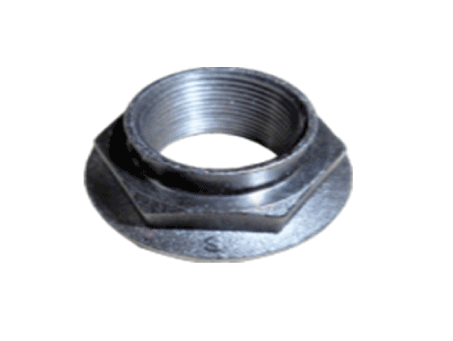
|
| •
| When replacing the drive lock hub nut, use only the nut with screw thread (A) on the end. 
|
| •
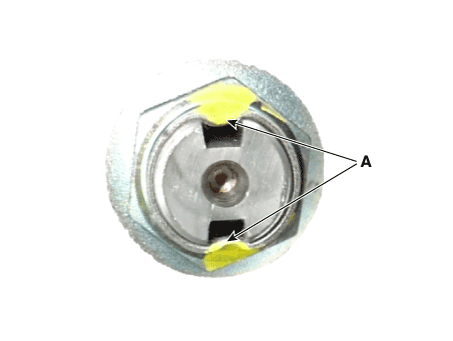
| Tighten the driveshaft lock hub nut to the specified tightening torque, and caulk by using a chisel and hammer. |
| •
| If there are two key seats, perform on all two seats. Caulking depth (A) : 1.5 mm (0.0591 in) |
|
|
|
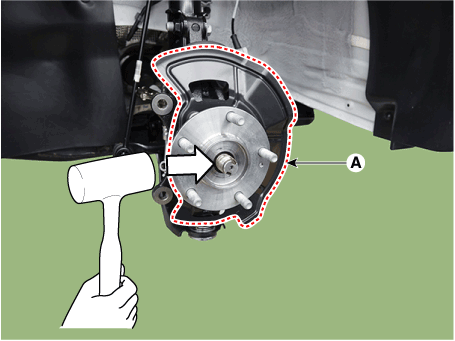
| 7. | Loosen the mounting bolts from the knuckle and then remove the hub bearing assembly and dust cover (A) by using the plastic hammer. Tightening torque : 78.5 - 98.1 N.m (8.0 - 10.0 kgf.m, 57.9 - 72.3 lb-ft) |
| •
| When removing the drive shaft, use a plastic hammer in order to avoid shock applied to the front knuckle. |
| •
| When removing the drive shaft, do not forcibly pull or excessively bend the front knuckle to separate. |
|
|
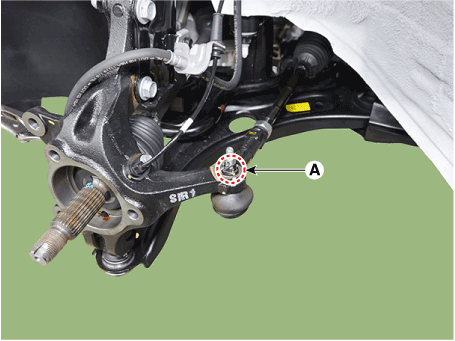
| 8. | Remove the tie rod end ball joint by using the special service tool. | (1) | Remove the split pin and catle nut (A). |
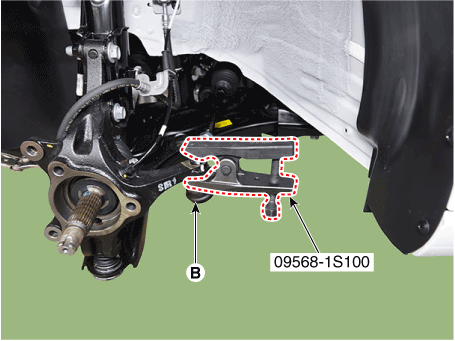
| (2) | Remove the tie rod end ball joint (B) by using the SST (09568-1S100). Tightening torque : 34.3 - 44.1 N.m (3.5 - 4.5 kgf.m, 25.3 - 32.5 lb-ft) |
| •
| Do not reuse castle nut. |
|
|
|
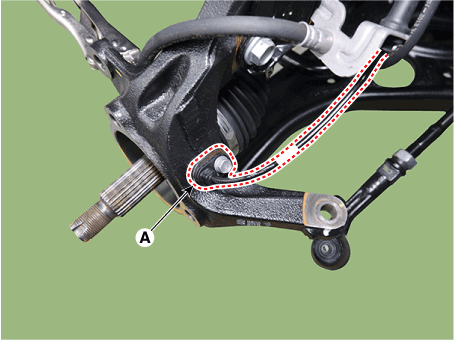
| 9. | Remove the wheel speed sensor (A) from the knuckle after loosening the mounting bolt. Tightening torque : 7.8 - 11.8 N.m (0.8 - 1.2 kgf.m, 5.8 - 8.7 lb-ft) |
|
| 10. | Separate the lower arm ball joint by using the SST (09568-1S100) after loosening the lower arm mounting nut (A). Tightening torque : 68.6 - 80.4 N.m (7.0 - 8.2 kgf.m, 50.6 - 59.3 lb-ft) |
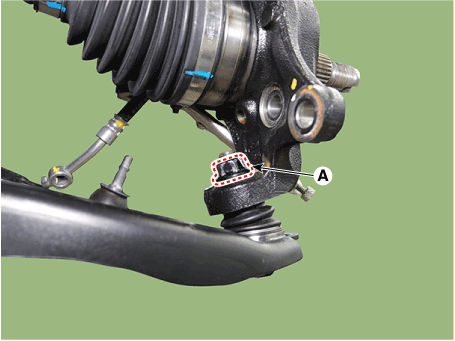
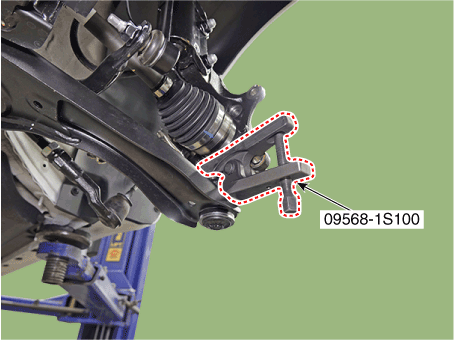
|
| 11. | Remove the front knuckle (A) after loosening the bolts and nuts. Tightening torque : 156.9 - 176.5 N.m (16.0 - 18.0 kgf.m, 115.7 - 130.2 lb-ft) |
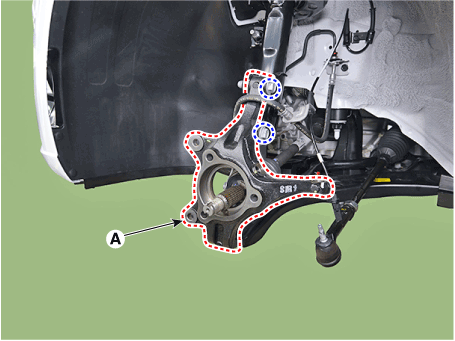
|
| 1. | Check the hub for cracks and the splines for wear. |
| 2. | Check the brake disc for scoring and damage. |
| 3. | Check the knuckle for cracks. |
| 4. | Check the bearing for cracks or damage. |
| 1. | To install, reverse the removal procedures. |
| 2. | Check the alignment. (Refer to Suspension System - "Alingment") |
Special Service Tools
Tool (Number and Name)
Illustration
Use
09495-3K000Band installerInstallation of ear type boot ba ...
Front Driveshaft
Components and components location
Components1. Driveshaft (LH)2. Dynamic damper3. Driveshaft (RH)
Repair procedures
Removal1.Loosen the wheel nuts slightly.Raise the veh ...
 Hyundai Elantra CN7: Front Axle Assembly. Front Hub / Knuckle / Tone Wheel


