 Hyundai Elantra MD/UD: Exhaust Manifold. Repair procedures
Removal and Installation
| 1. |
Remove the engine cover.
|
| 2. |
Disconnect the battery negative terminal.
|
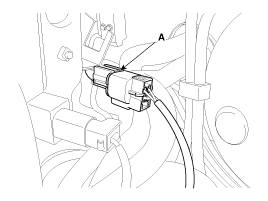
| 3. |
ULEV: Disconnect the front oxygen sensor connector (A) and then
remove it from the bracket.
SULEV: Disconnect the front and rear oxygen sensor connectors
(A) and then remove them from the bracket.
|

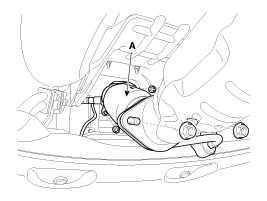
| 4. |
Remove the front muffler (A).
|
| 5. |
ULEV: Remove the exhaust manifold heat protector (A).
SULEV: Using the SST (09392-2H100), remove the front oxygen sensor
(A) and then remove the exhaust manifold heat protector (B).
|


| 6. |
Remove the driveshaft heat protector (A).
|

| 7. |
Remove the exhaust manifold stay (A).
[ULEV]
[SULEV]
|


| 8. |
Remove the exhaust manifold (A) with the gasket (B).
[ULEV]
[SULEV]
|


| 9. |
Installation is reverse order of removal.
|


